SMJ Cab, drawbar, and firebox
Steam gauge
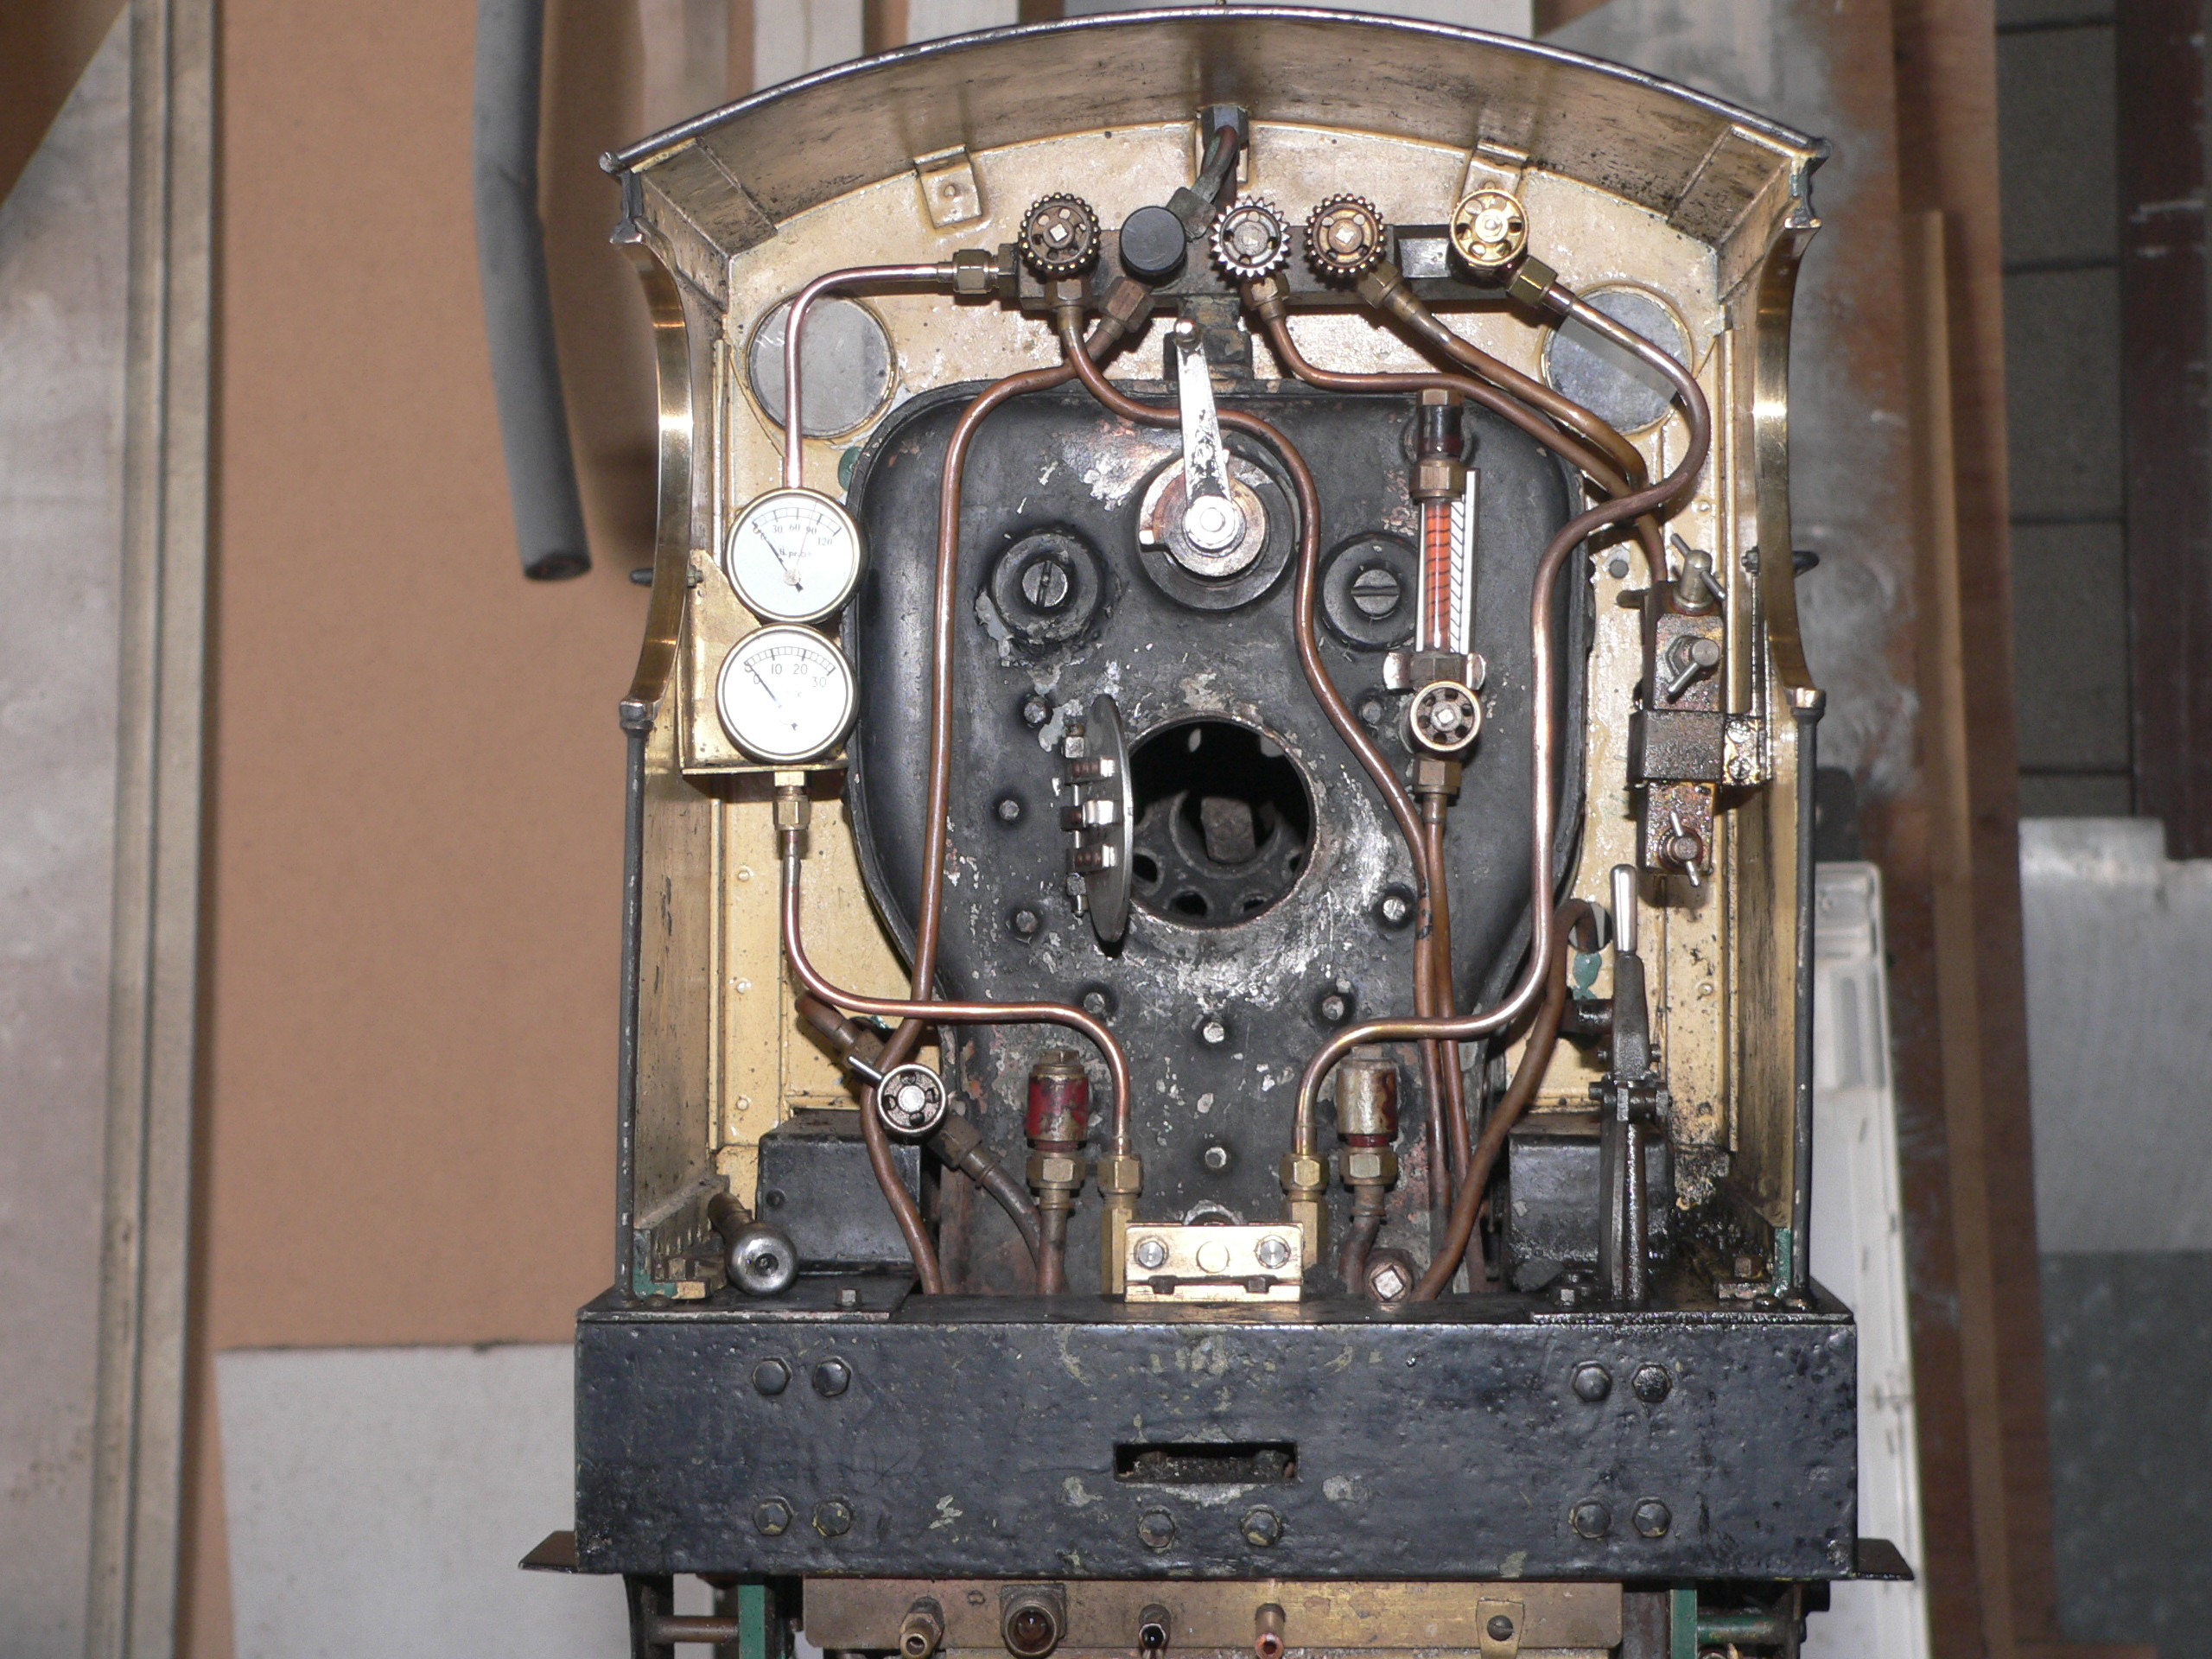
The steam gauge was positioned quite high in the cab. This was fine when the loco was driven on an elevated track but to see it on a ground level track I had to lean back or down from my normal driving position. The tube from the turret was too short to allow repositioning of the gauge. When I started to make a replacement tube I realised that the union on the turret had a non-standard thread.
I made a new union for the turret and then a replacement tube with nuts and tails. The steam gauge now sits immediately above the vacuum gauge.
Regulator Arm
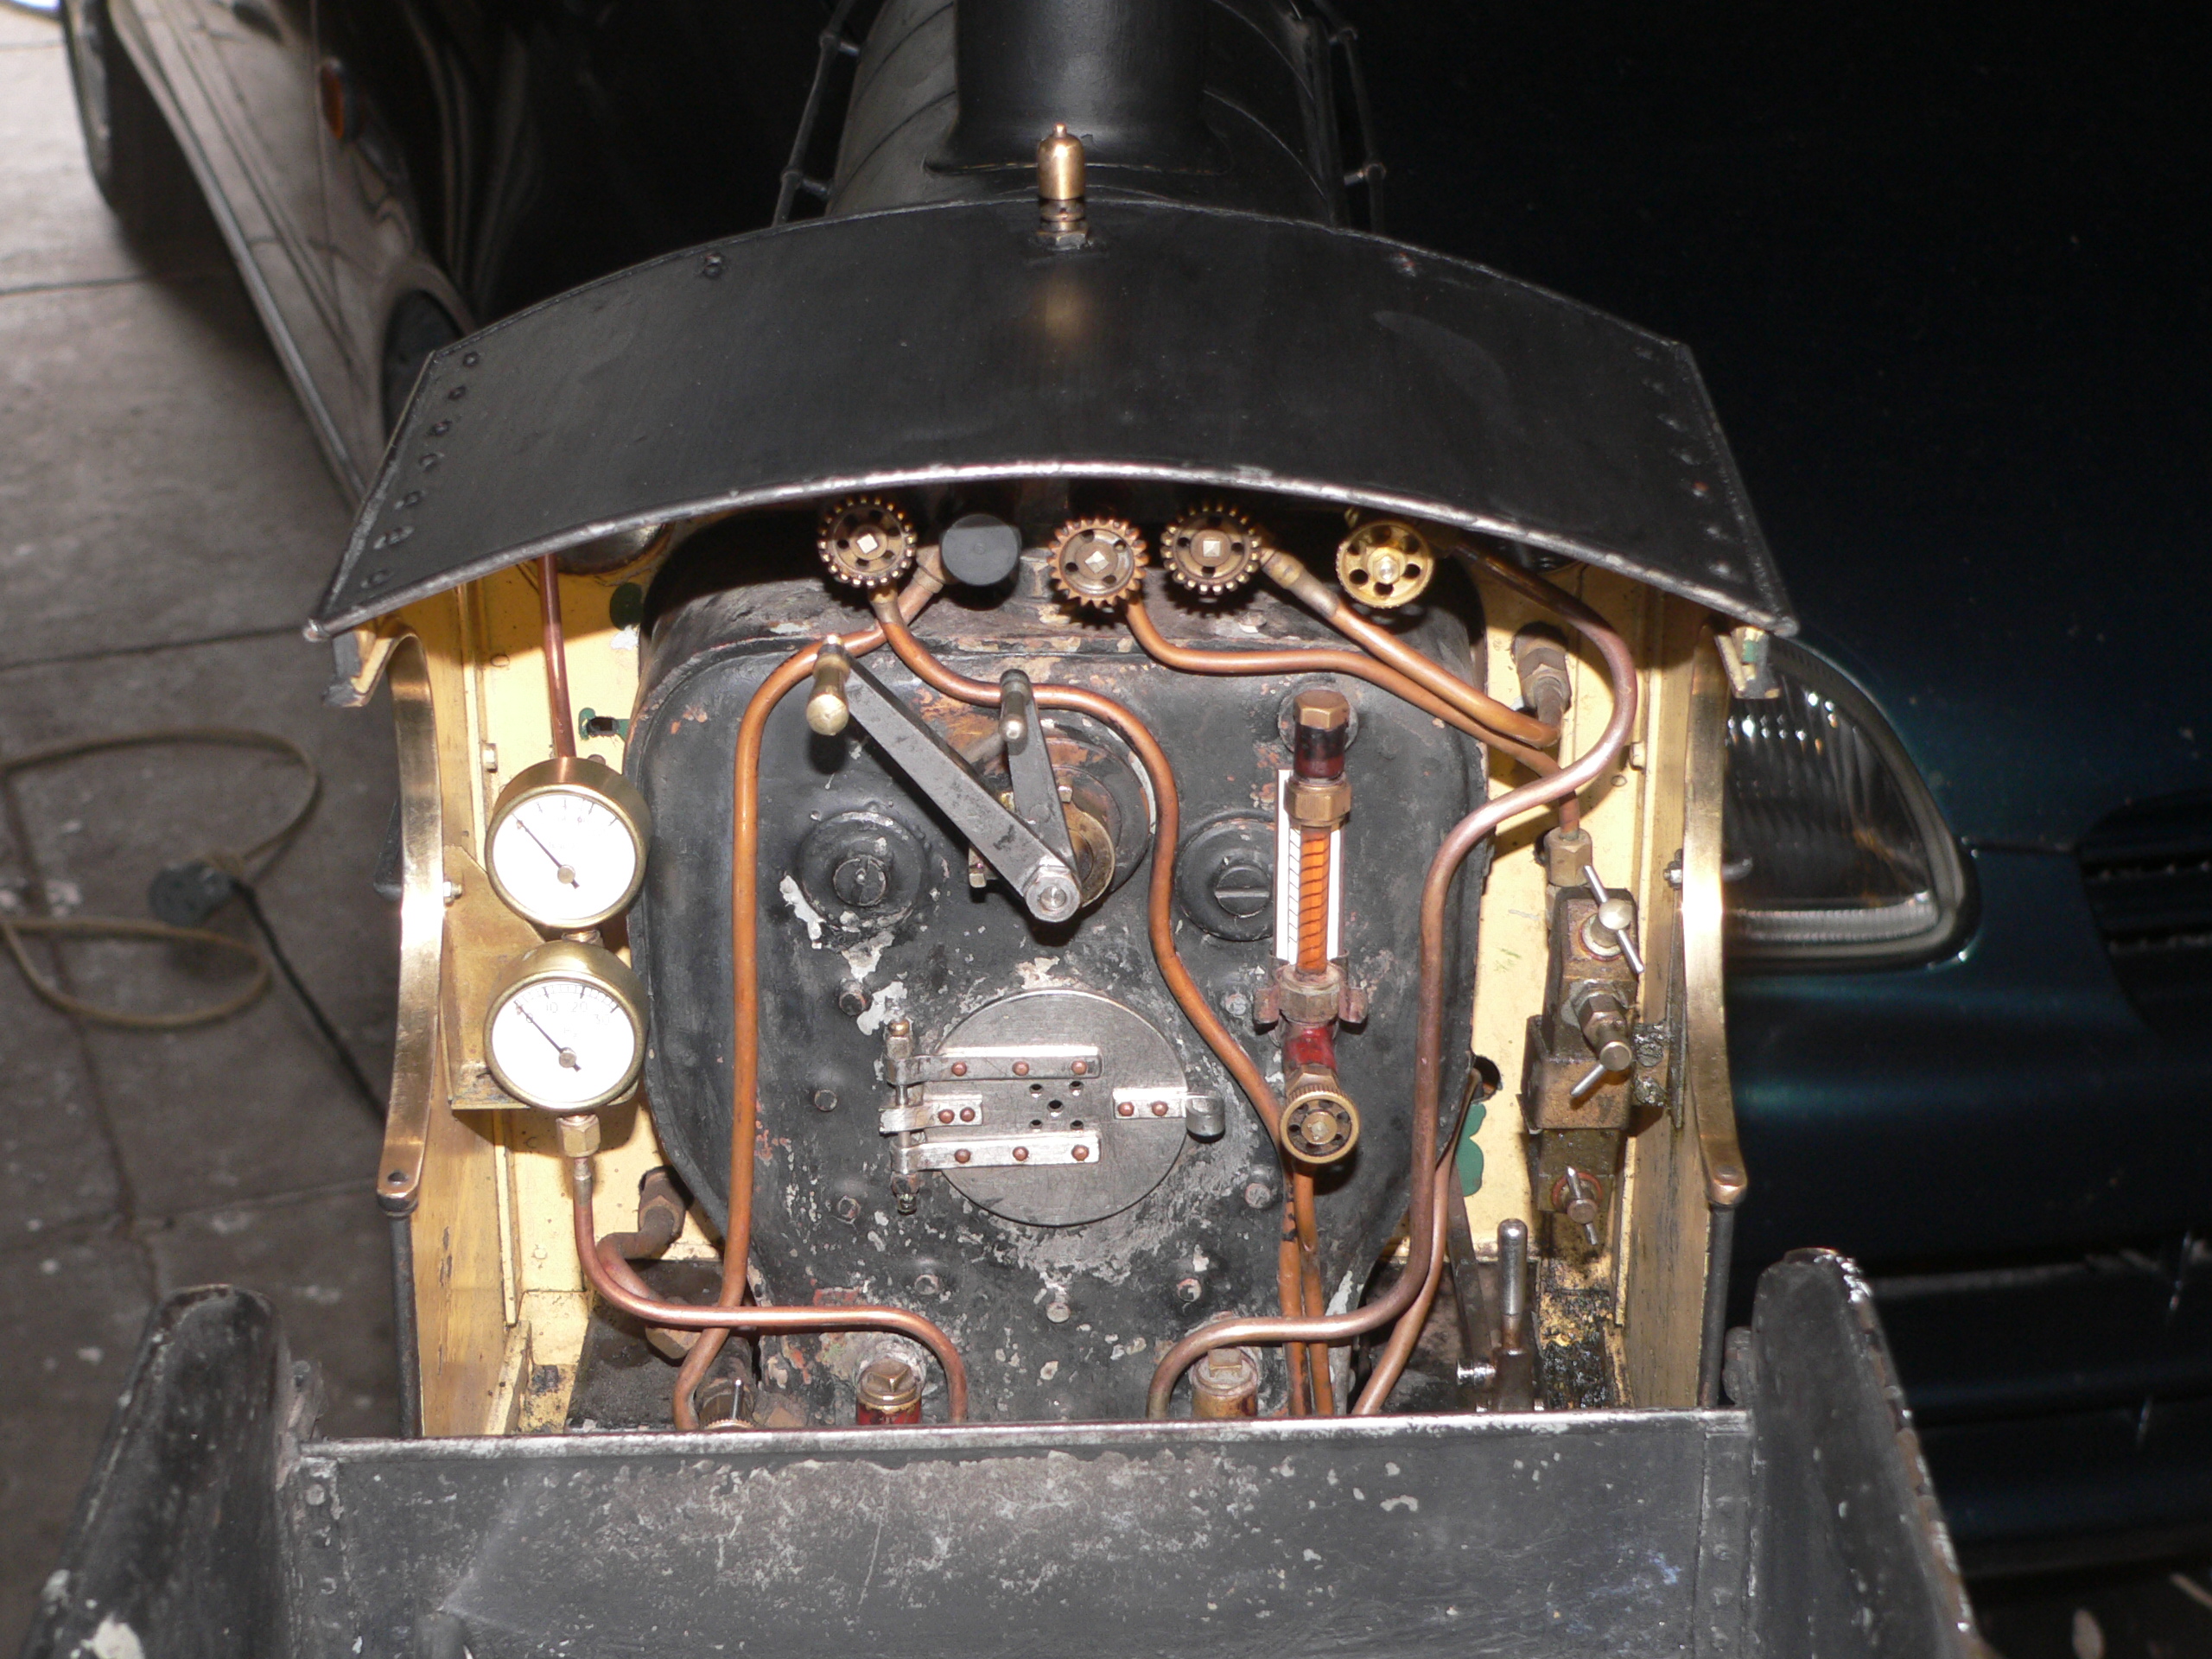
The regulator arm is too short to control the steam by the handle only. Grabbing the arm requires a rag or glove as it is uncomfortably warm. Rather than replace the existing arm I made an additional arm with a brace that locks on the stop pin on the original arm. The new arm is 50mm from the pivot to the handle and positioned so it is just below the handwheels when the regulator is closed. When the regulator is fully open the new arm is about 30° below horizontal. With this new arm I can rest my hand on the cab roof or tender side and this makes it easier to control the regulator.
Notice the colour in the gauge glass. This is due to boiler treatment and makes it easy to distinguish between a totally full glass and a totally empty one. Normally I water wedge (totally fill) the boiler at the end of a day rather than emptying it as most people do. This avoids the chance of the treatment drying out and sticking to the boiler. For an initial fill (about 7 litres) I add 10ml of treatment. For each run I add 3ml/5ml of treatment to the boiler (via the blowdown) at the start of the day. The treatment is a 50/50 mix of Tandex Polyfloc and Tandex BWS. Some people use Tandex Tanblend but this seems a bit too alkaline (pH 12) to me for a copper boiler. Hydrochem 4845 looks like another suitable treatment and I'll try this someday. The benefits in a copper boiler might be somewhat nebulous anyway. Treatment should reduce scaling but I can't imagine the oxygen scavenging working because model injectors suck so much air into the boiler.
Drawbar
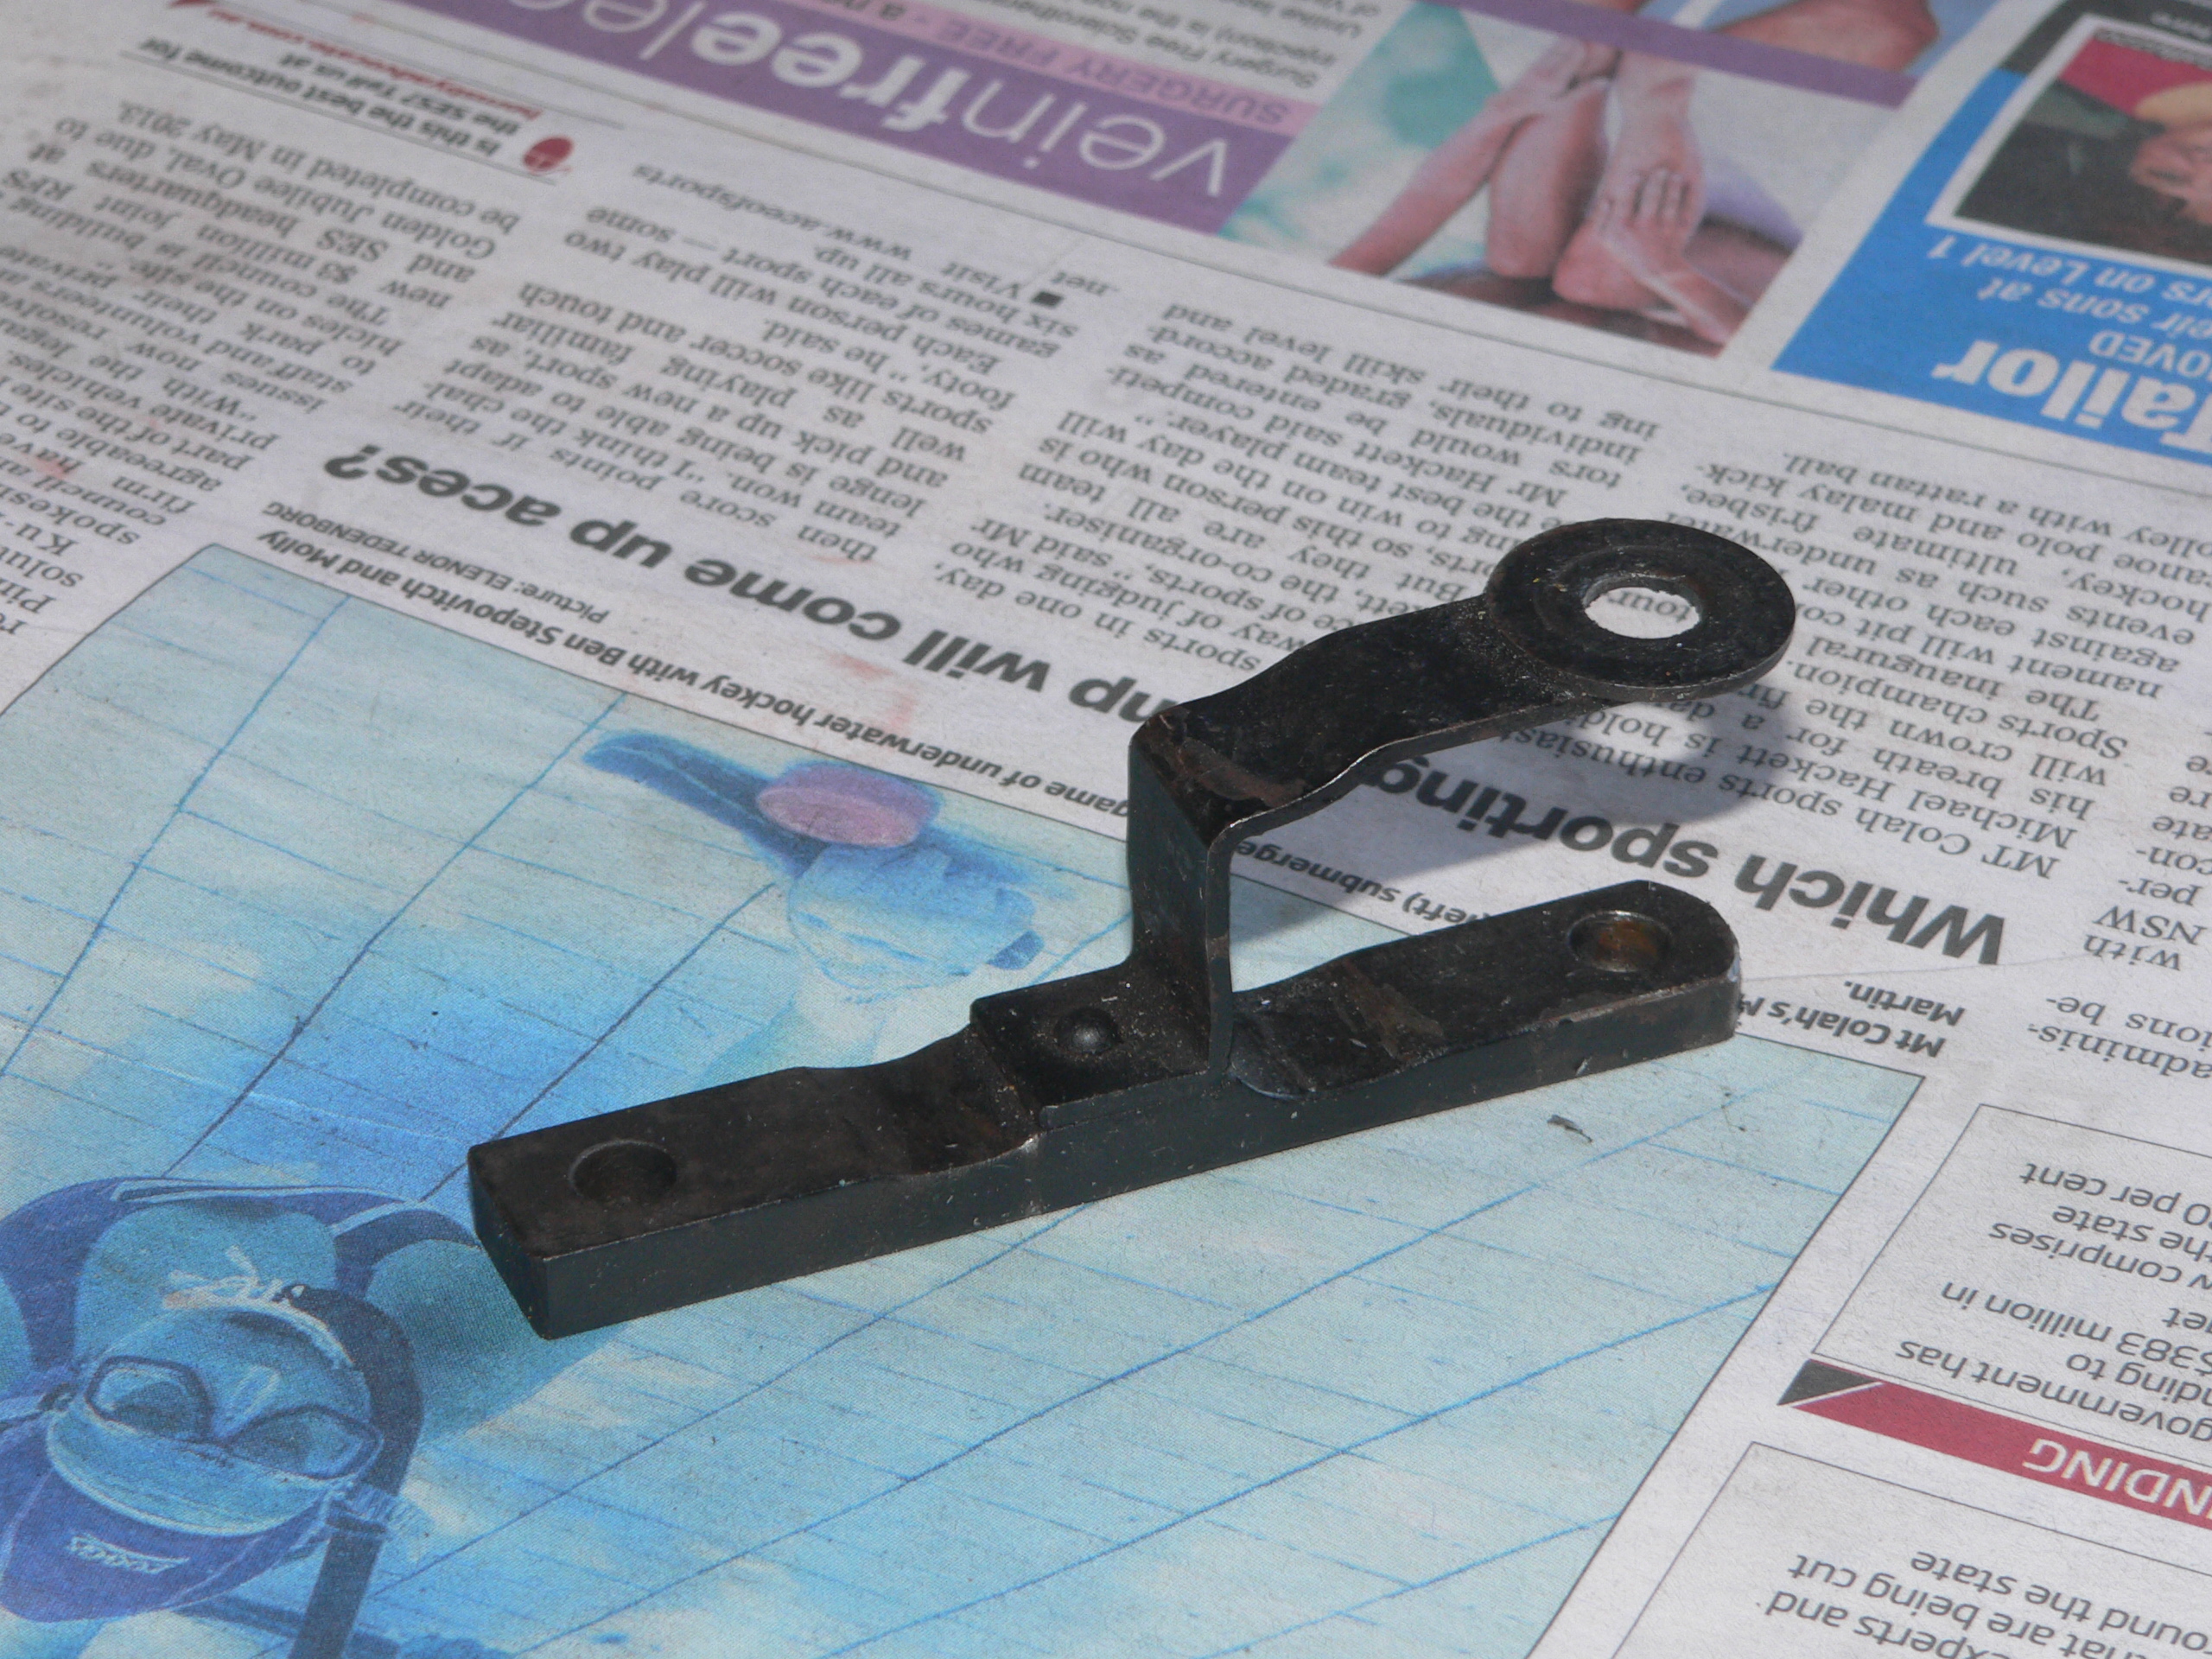
The original drawbar is unusual because it has a clevis and long pin at the front. This means the drawbar is always horizontal and this keeps the front of the tender at the same height as the back of the engine. Presumably this was done for aesthetics or maybe to stop the tender plate from lifting. A good side-effect is that weight on the footpegs (connected to a stretcher near the front of the tender) is transferred to the engine and improves the tractive effort. This might seem like cheating but little locos sometimes need extra help like this.
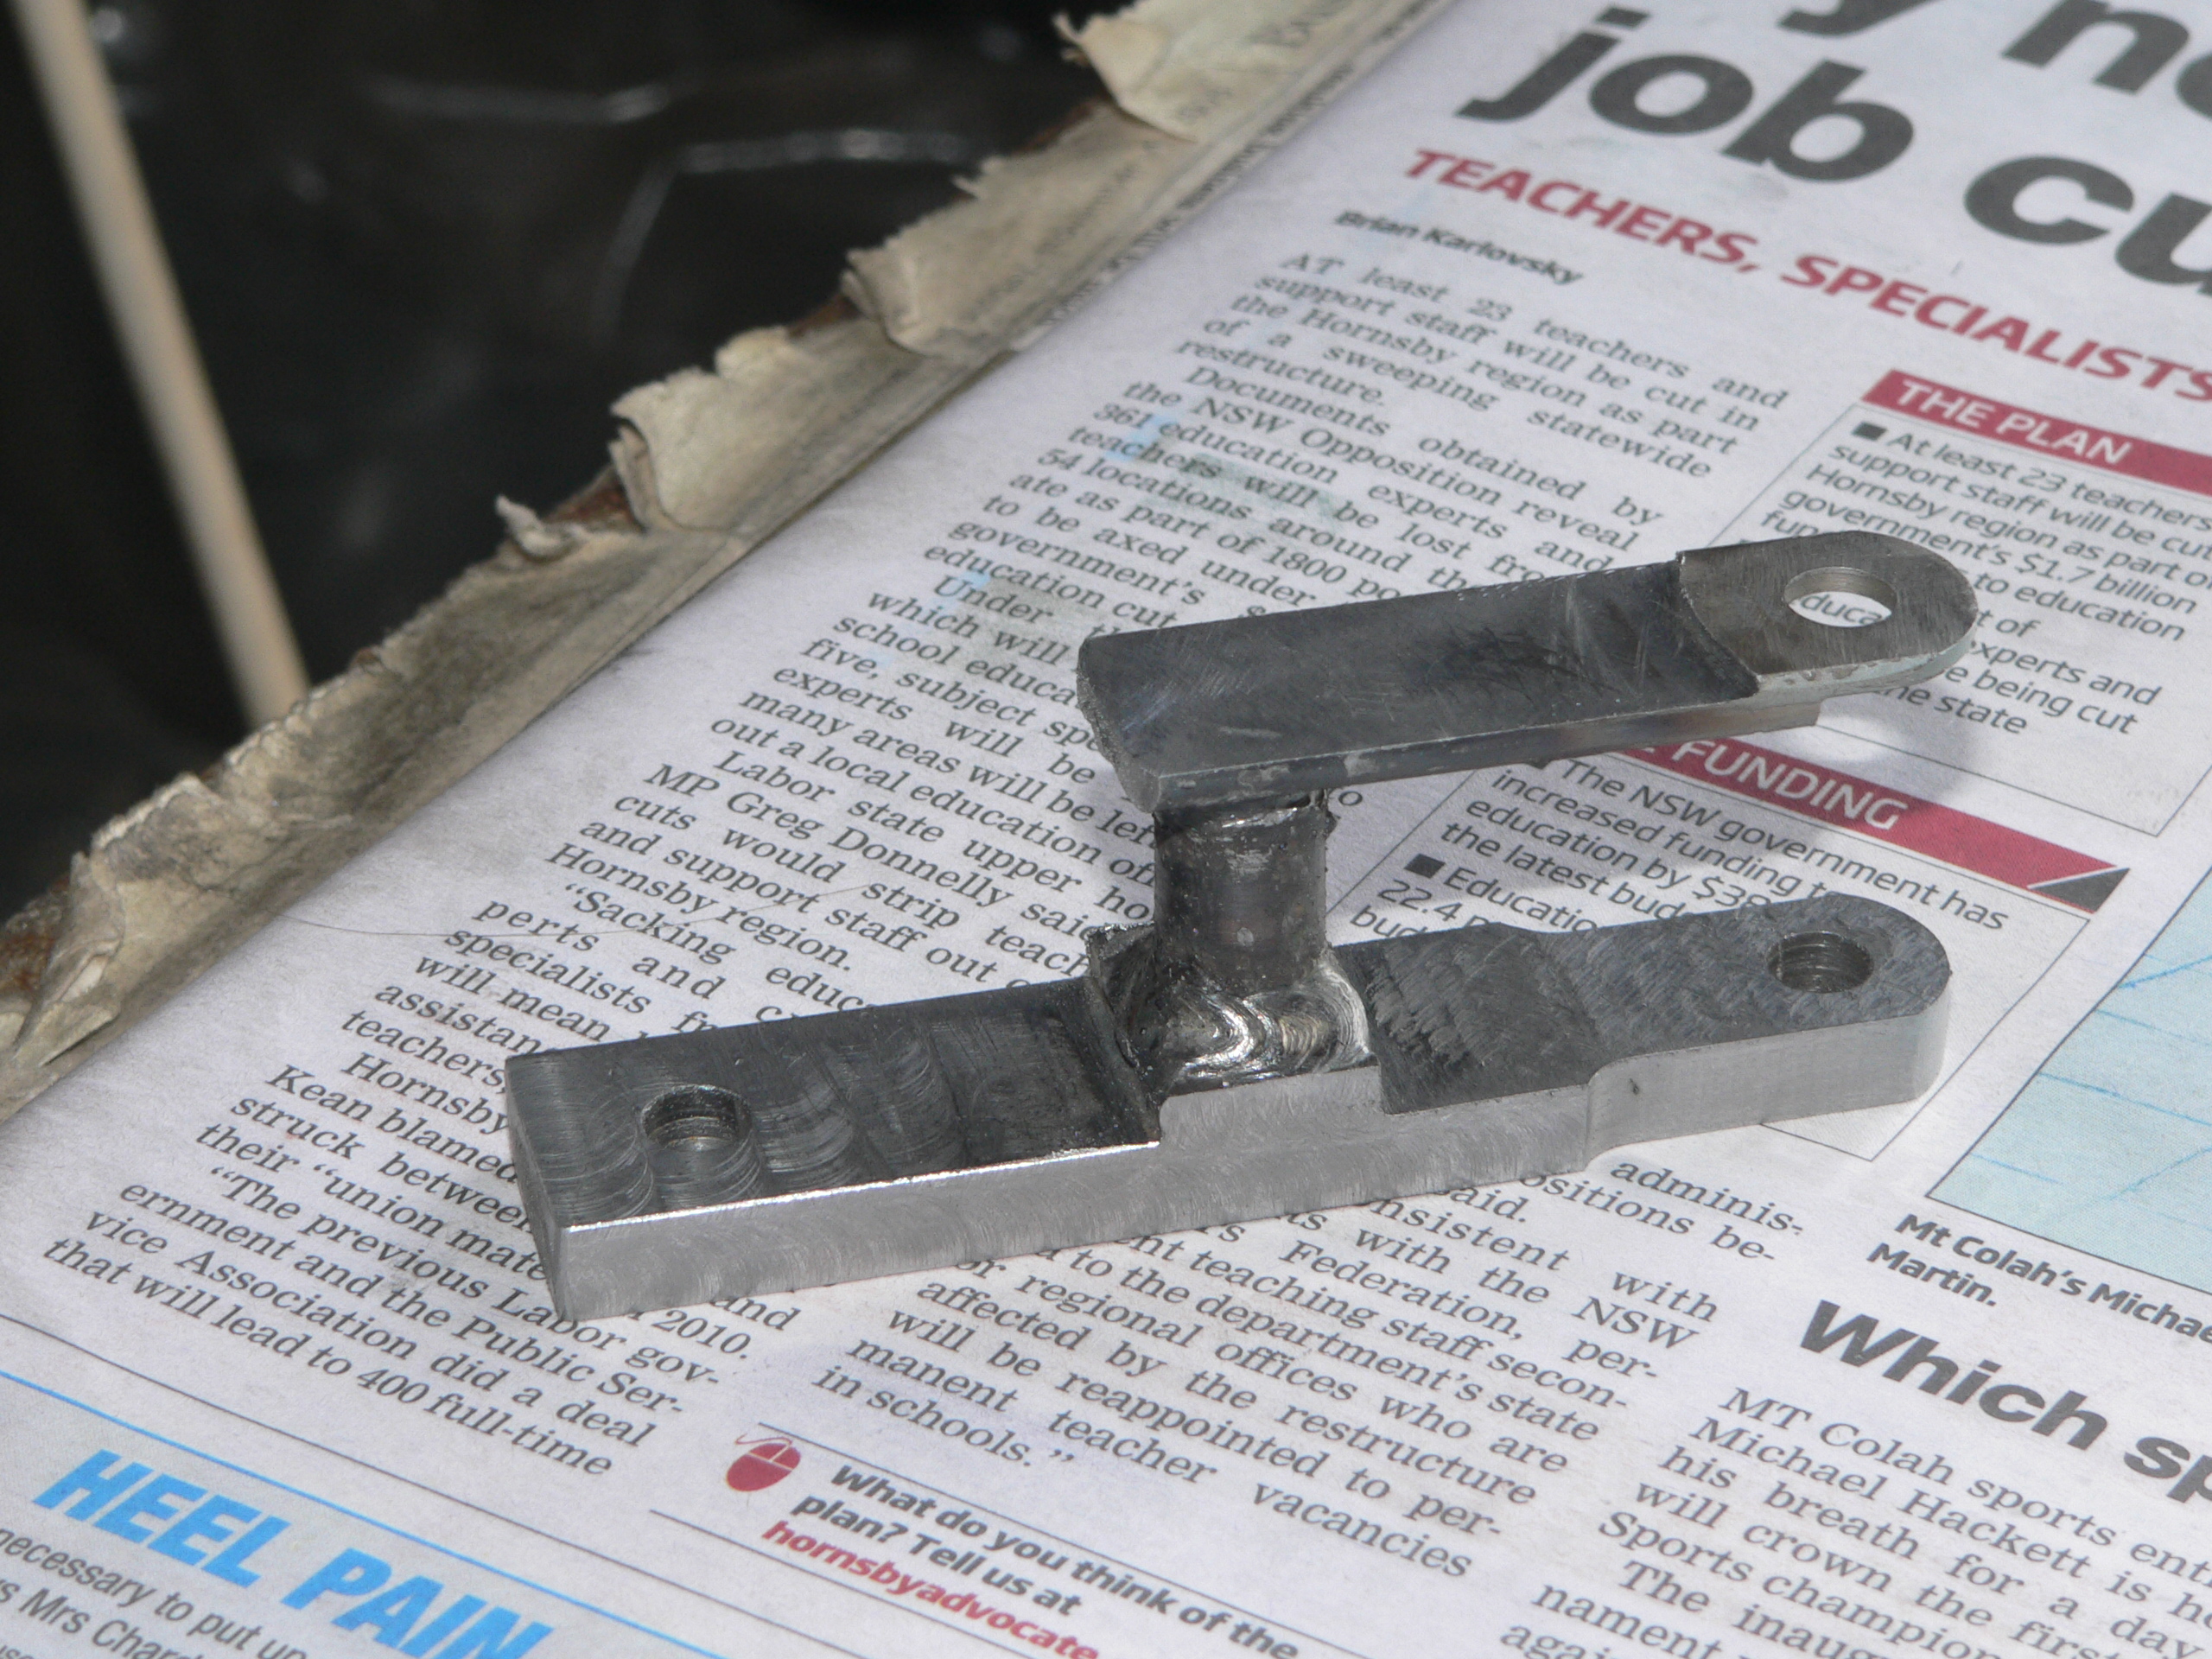
The new drawbar uses the same design and has a more rigid riser and the top bar is relieved to clear the tender plate and the raised bit of floor near the front drawpin.
Axle Pump Return Pipe

The water return pipe for the axle pump starts with a fitting near the backhead and passes through a brass plate at the back of the loco. The protruding pipe is where the plastic connecting pipe pushes on. Sometimes the bursts of water pressure blow the plastic pipe off and the loco then dumps water on the track until I've realised and fixed the pipe. The short-tem solution was to use a tie wire around the plastic pipe. I can't put any fitting on the end of the copper pipe as it's a tight fit through the brass plate. The solution is to make a compression fitting with a tail for the plastic pipe. This fitting contains a 3/16" x 1/16" O-ring and I push it on the end of the return pipe and then tighten the nut to compress the O-ring. Another idea was to permanently connect the pipes here and have a connection under the tender. This was discarded because it would be impossible to access without a pit. The compression fitting here is just accessible under the petticoat plate.
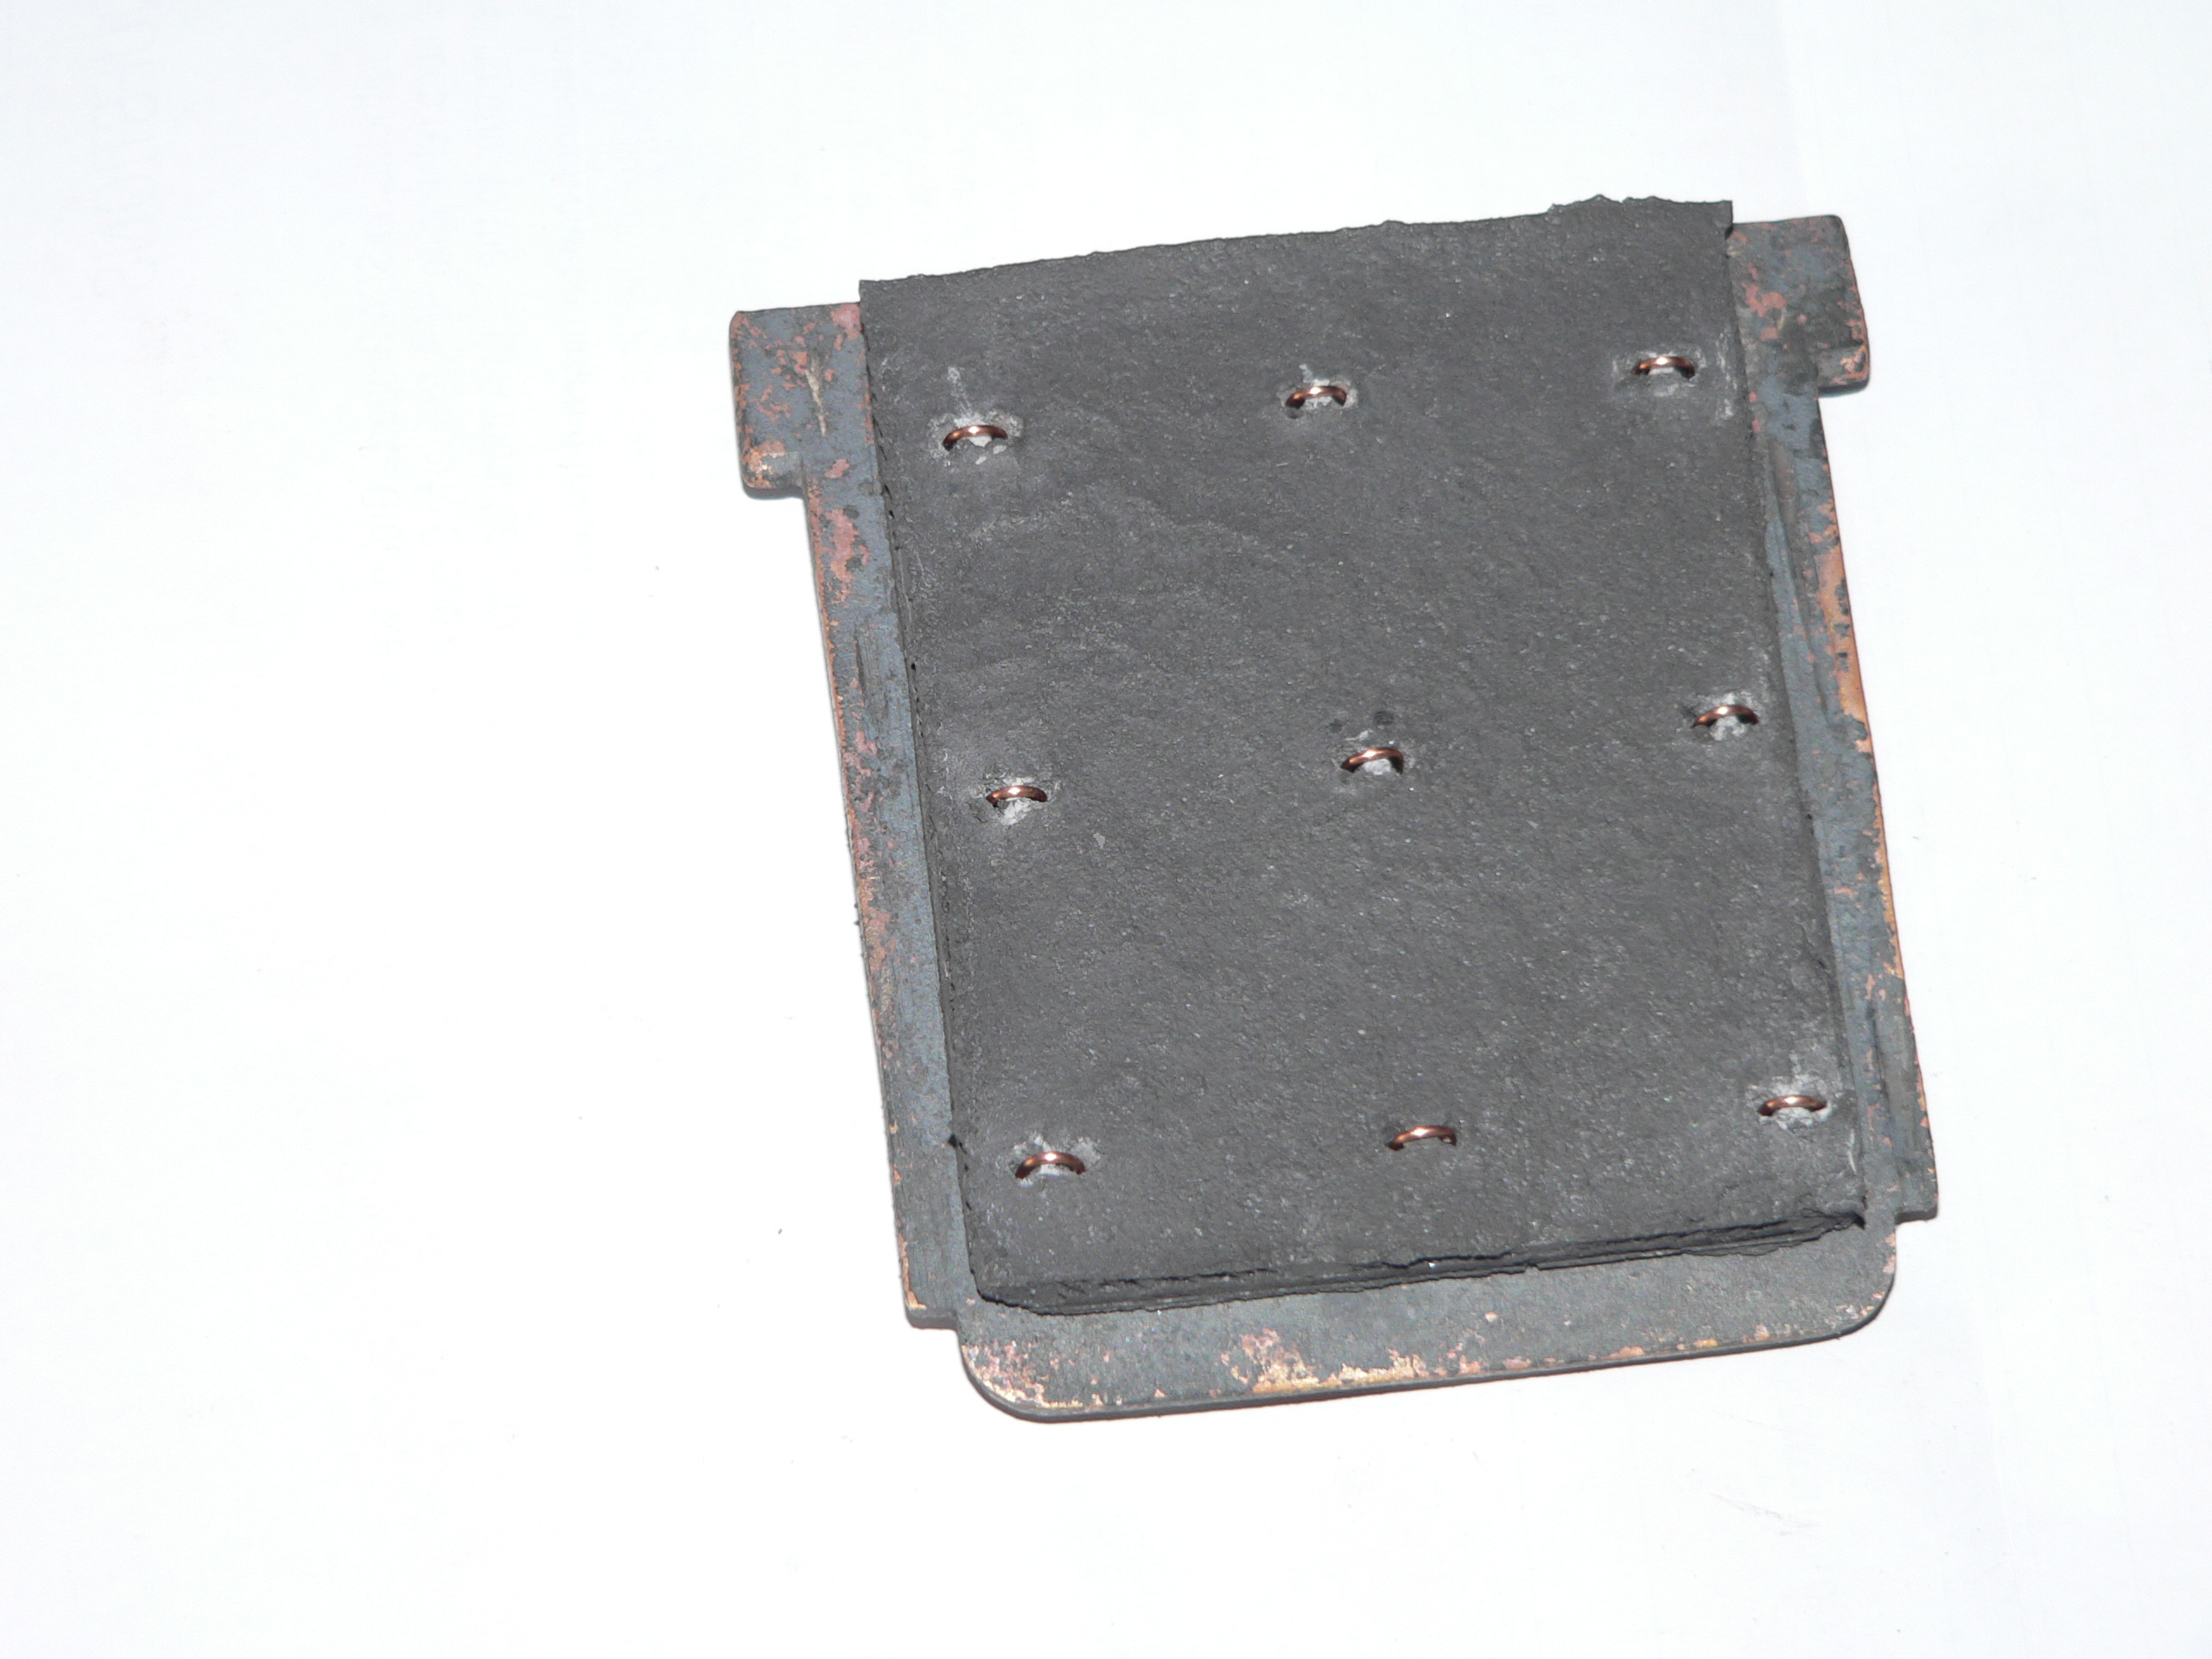
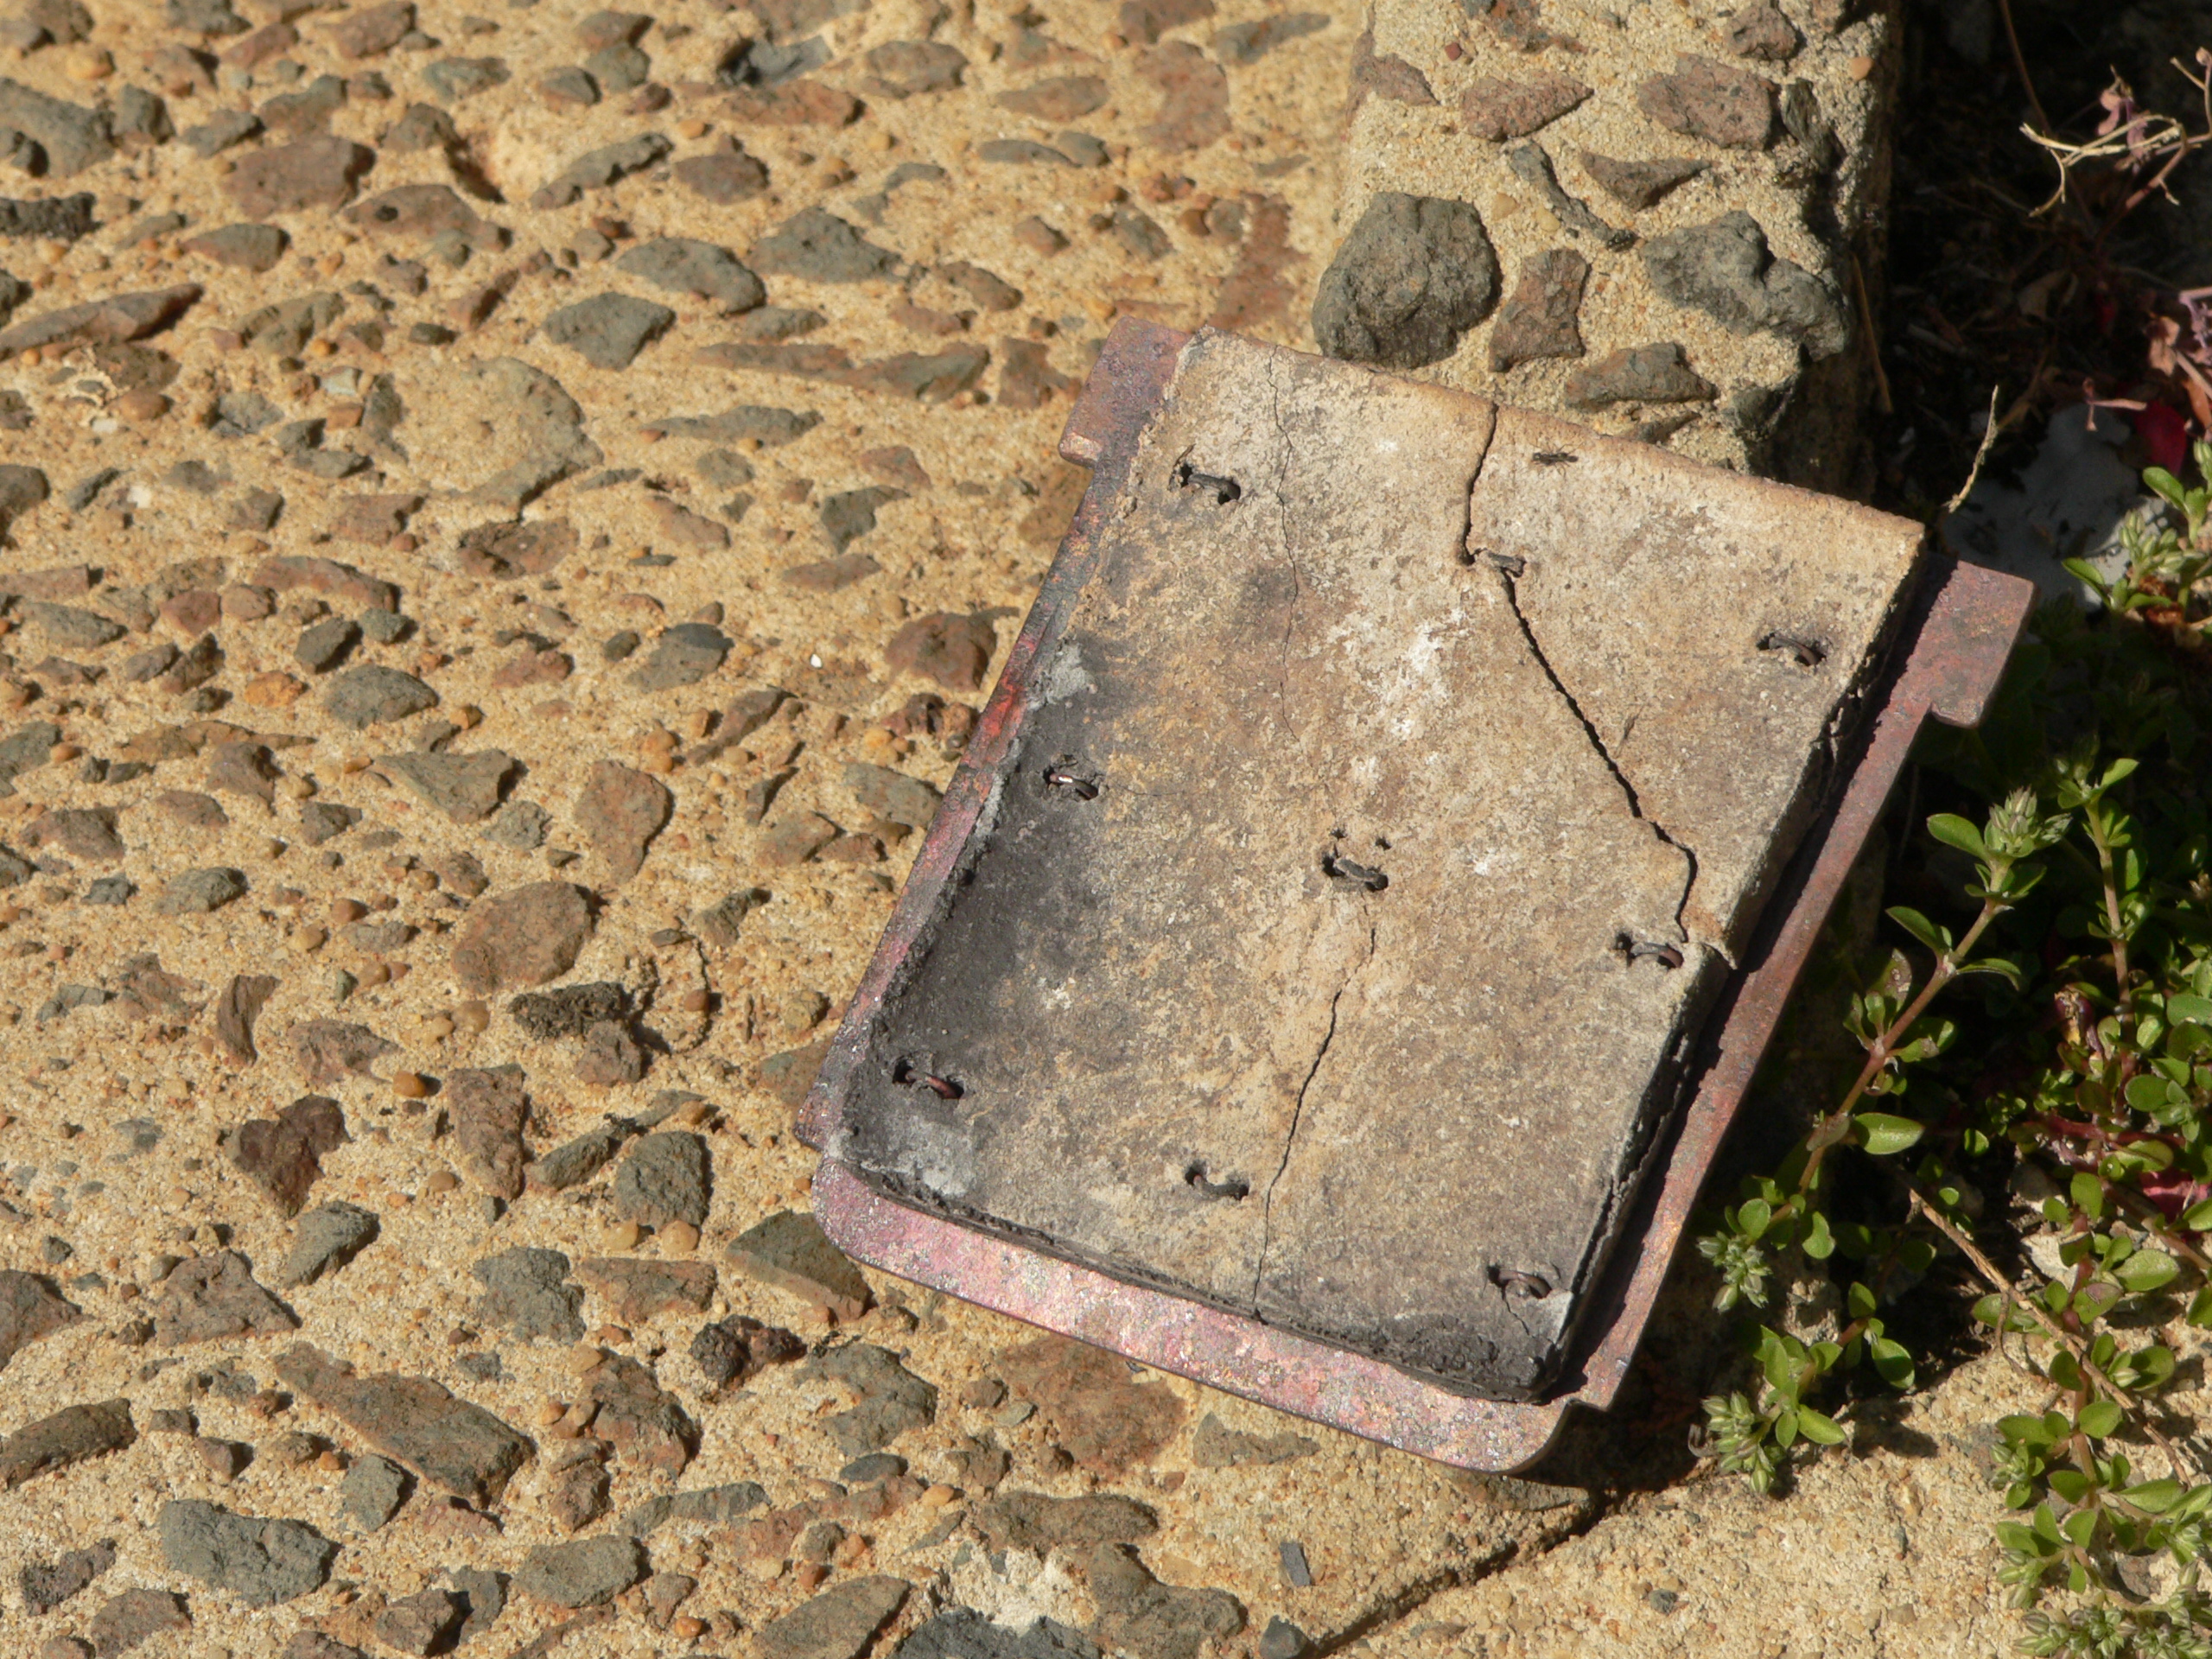
Firebox brick arch
Firing the loco using coal instead of char or coke causes big problems with clinker or excessive ash. Most coals don't work very well in the relatively tiny firebox. Perhaps a better fireman could keep the loco running all day but all my tests end with steaming problems and a blocked spark arrestor and tubes. Also, coal fires quickly form a solid mass that needs to be broken up with the fire iron to allow any draught. The one coal that's different is Clarence coal which creates lots of ash but no clinker.
To improve coal burning I tried a "brick arch" made from Kao-board which is 6mm thick and meant to handle 1200°C. The first arch was just a piece of the board lodged in place and located by the stay heads on the inner wrapper. This worked for a few hours until I hit it with the fire iron and dislodged it. The loco ran well for this test and perhaps better than later when I continued the run without the arch. So the idea seems good and the Kao-board seems adequate.
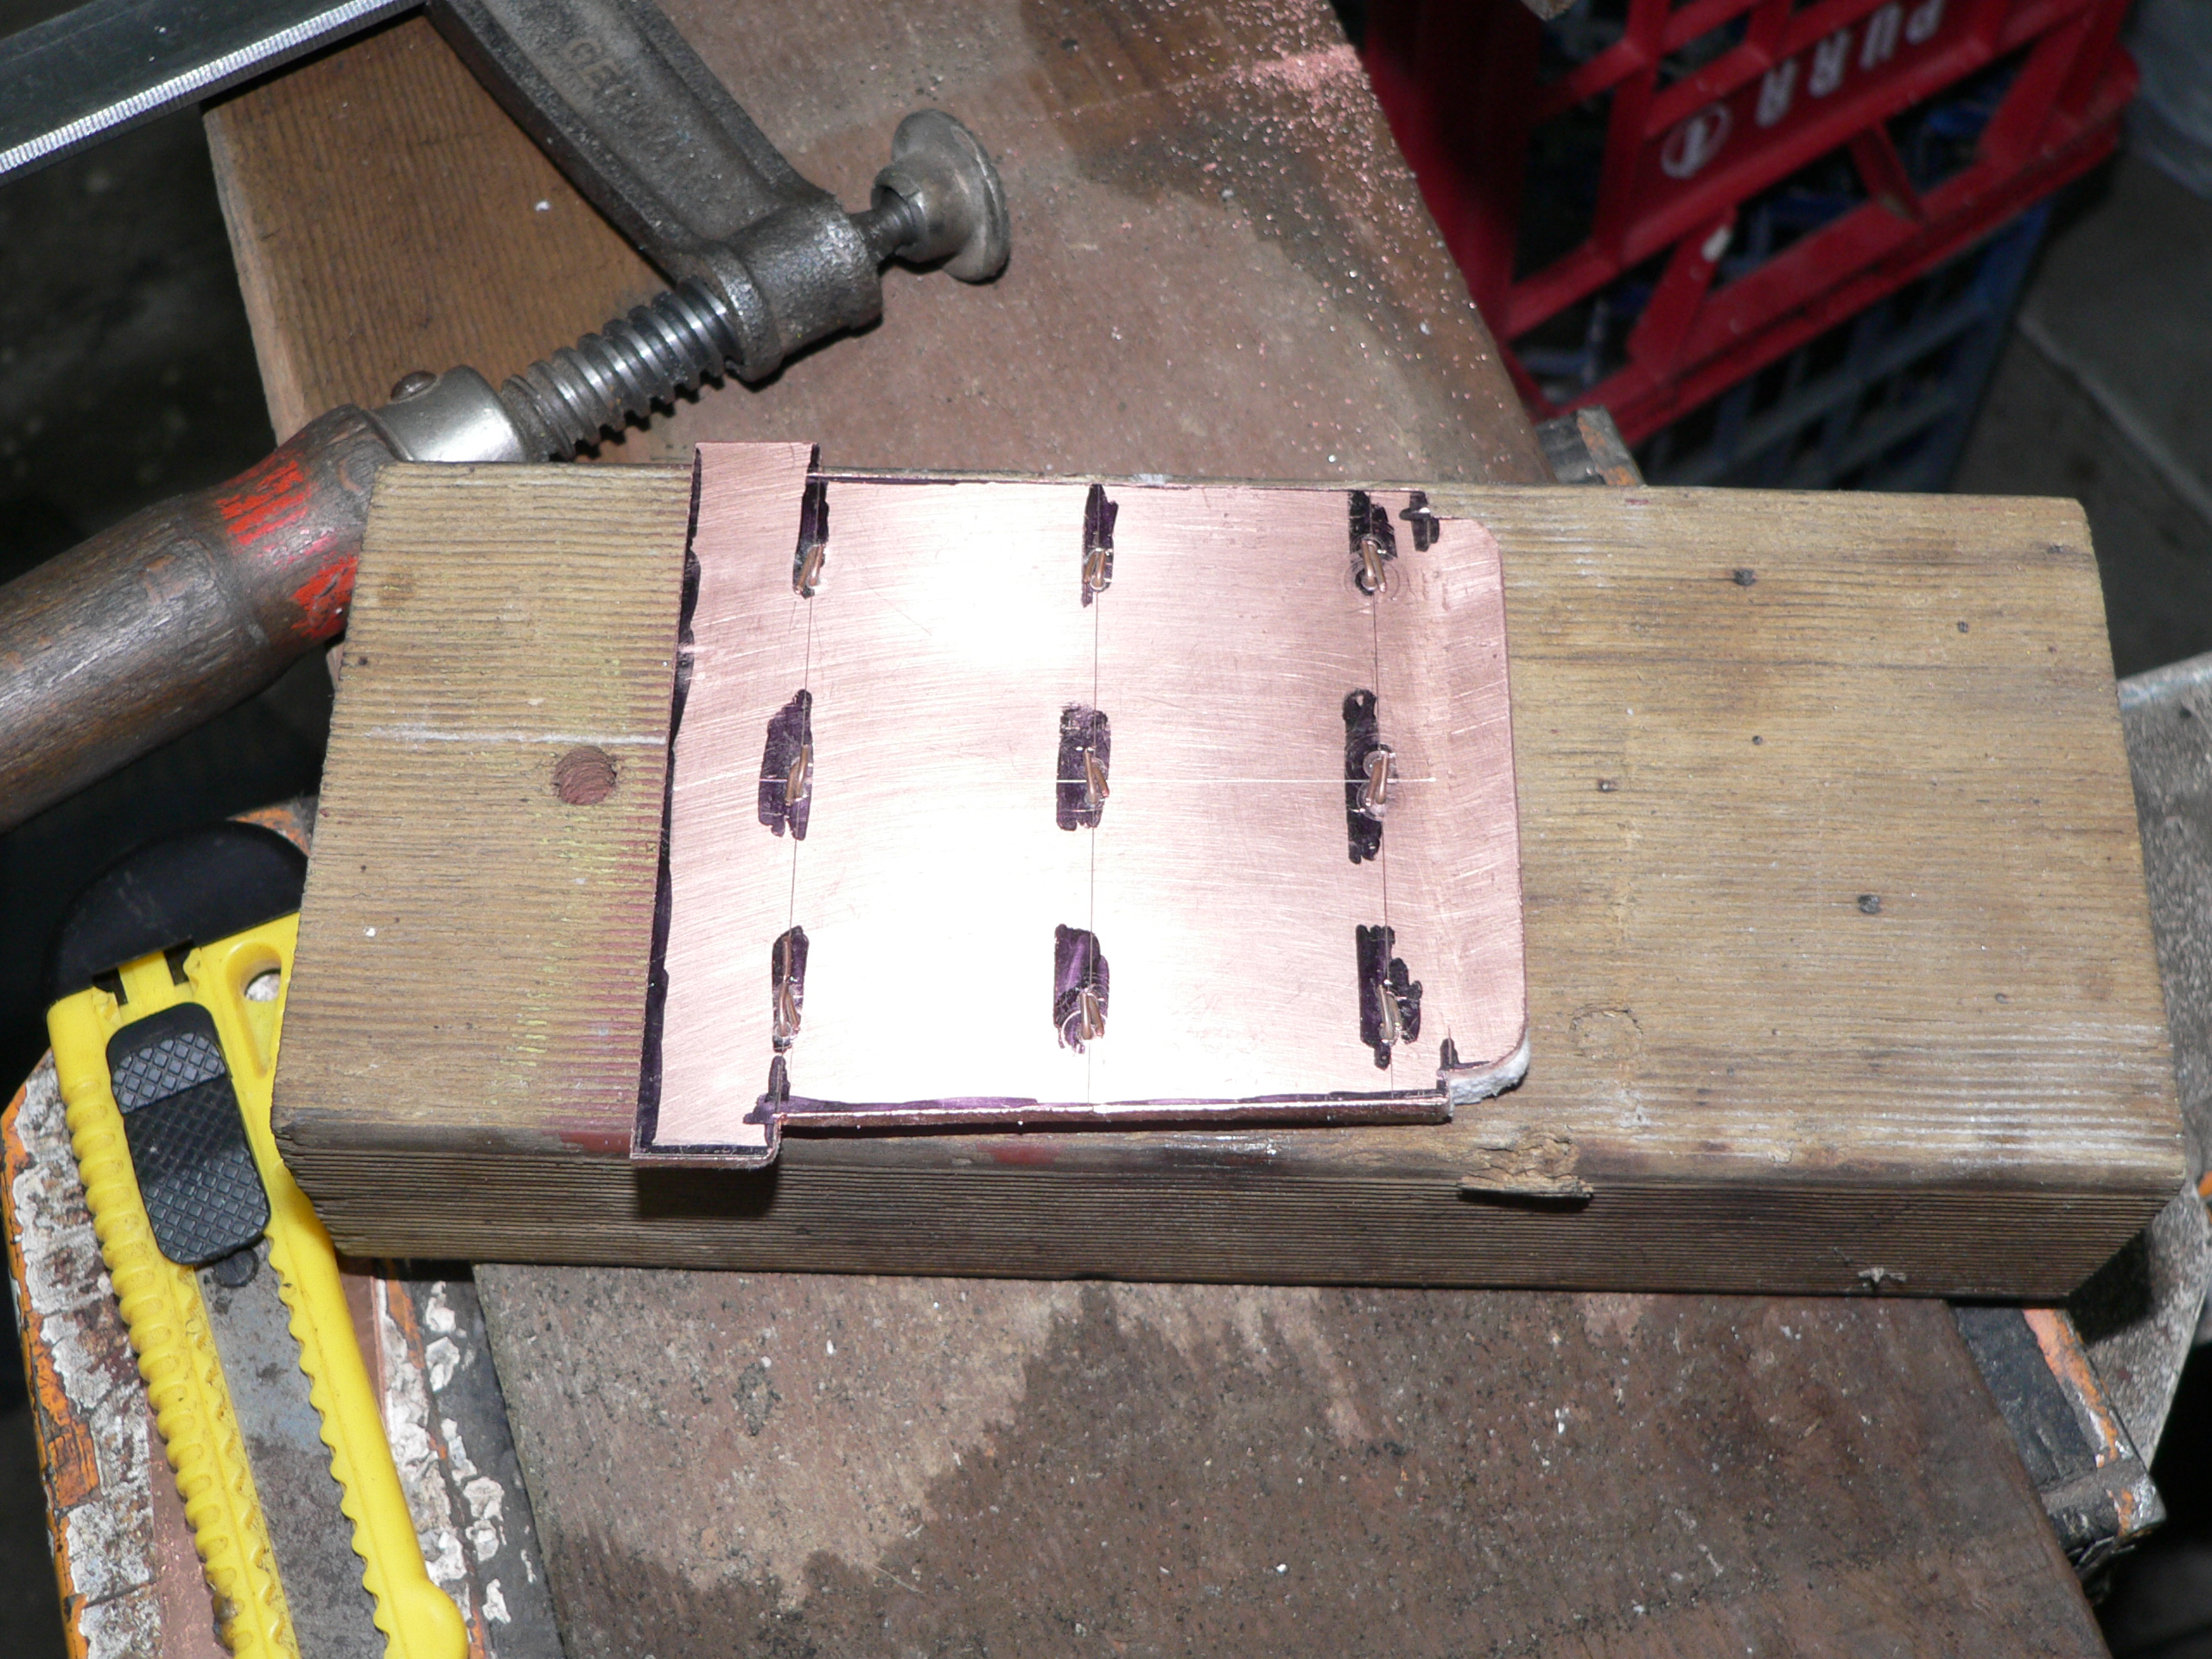
Some people use a metal arch and this is generally stainless steel. My test arch is made from 2.5mm copper with Kao-board fixed to the underside. The theory here is that copper will conduct heat much better than stainless steel and therefore the temperature of any hot spots will be reduced. The radiated heat from the fire will be blocked by the insulating board and the heat that gets to the copper should be radiated to the upper firebox or transferred to the flue gases. If the arch gets to 600°C it should help the combustion. If the arch stays below 900°C it should survive.
The arch is installed by holding it diagonally and pushing it up to the top back of the firebox then positioning it horizontally and sliding it forward and down till it contacts the front of the firebox under the tubes. Luckily it sits on two rows of stays and is restrained on top by two stays. The pictures show the top and bottom of the arch. The Kao-board is tied to the copper sheet by nine loops of copper wire.
The arch has survived the first test and the loco ran well with it. The insulating board is too fragile however. Subsequent testing showed the board is unlikely to last more than one run. A friend suggested I try a piece of tile instead and provided a test piece. I trimmed this and drilled holes for the copper tie wires. The initial test was good and the loco ran well all day. The tile now has a crack but is still okay for more testing.
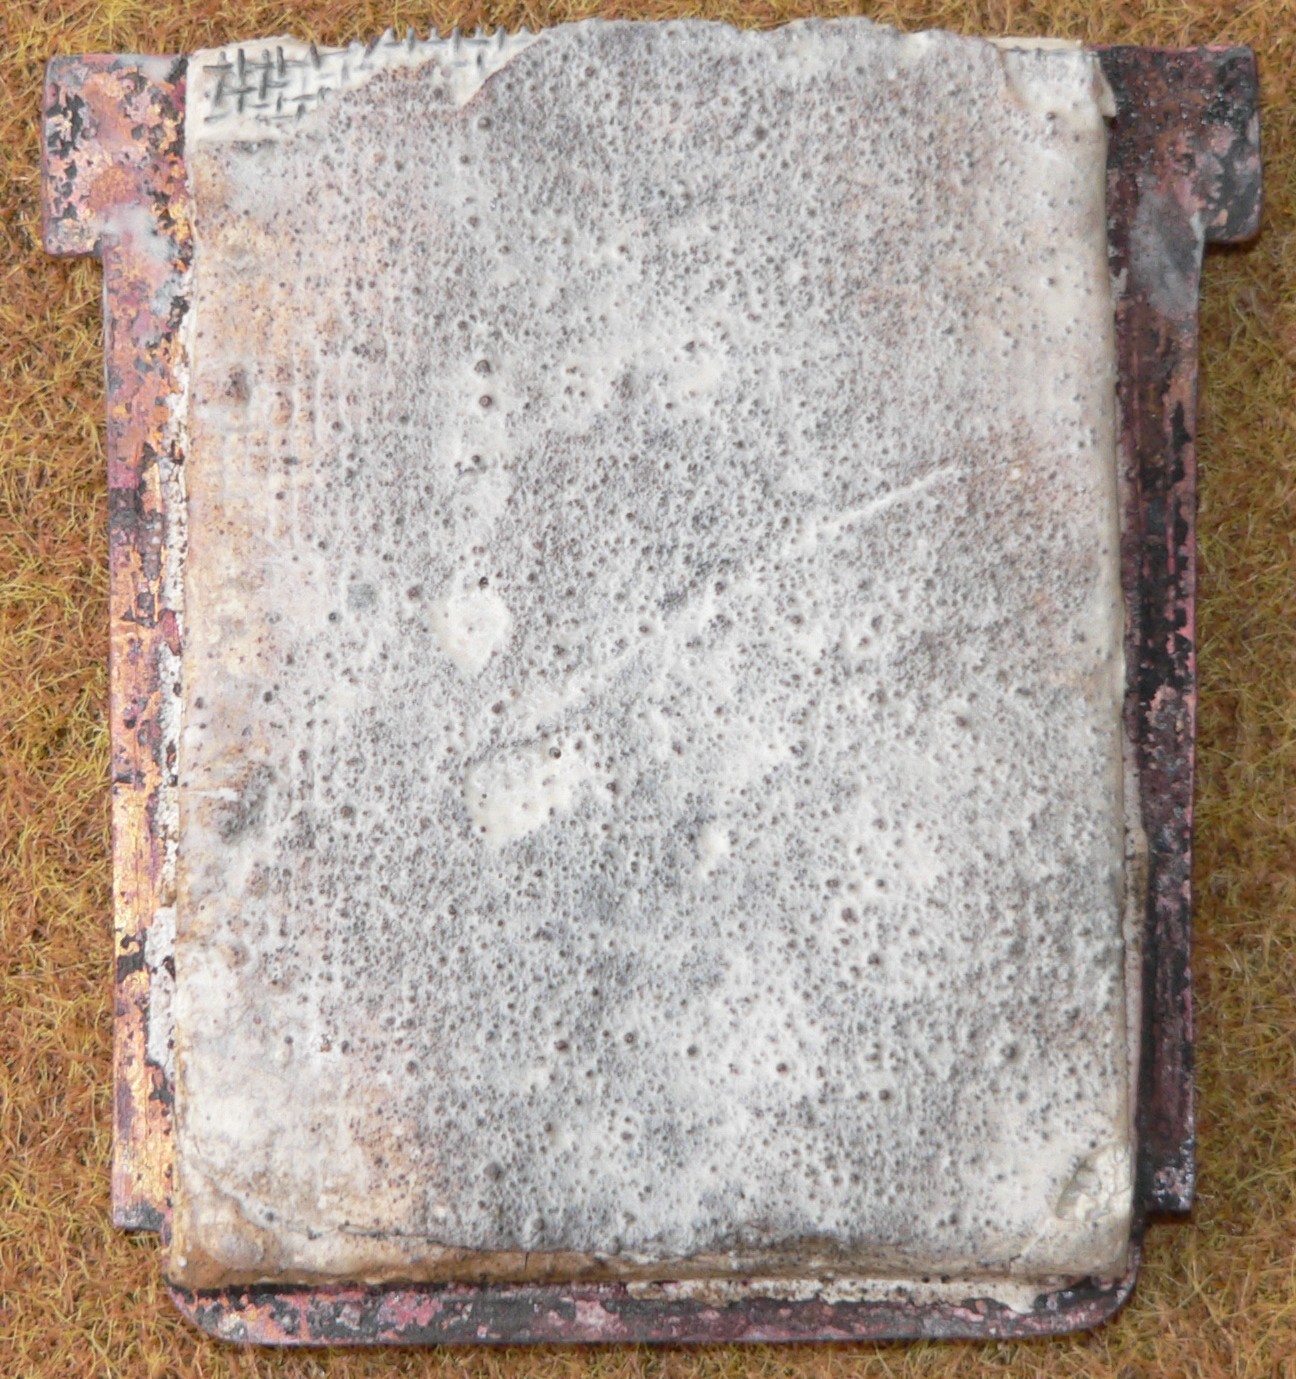
The tile didn't last long so I decided to try to make a shield using a castable refractory. Real locos use Pyrocrete 165 and I made two shields from this. Both were too weak and crumbly and didn't last even one run. Then I tried Shirabond 50 wet-mix which shrunk excessively during the initial drying. The result is too distorted to use. It is strong and perhaps a slower initial drying will help here.
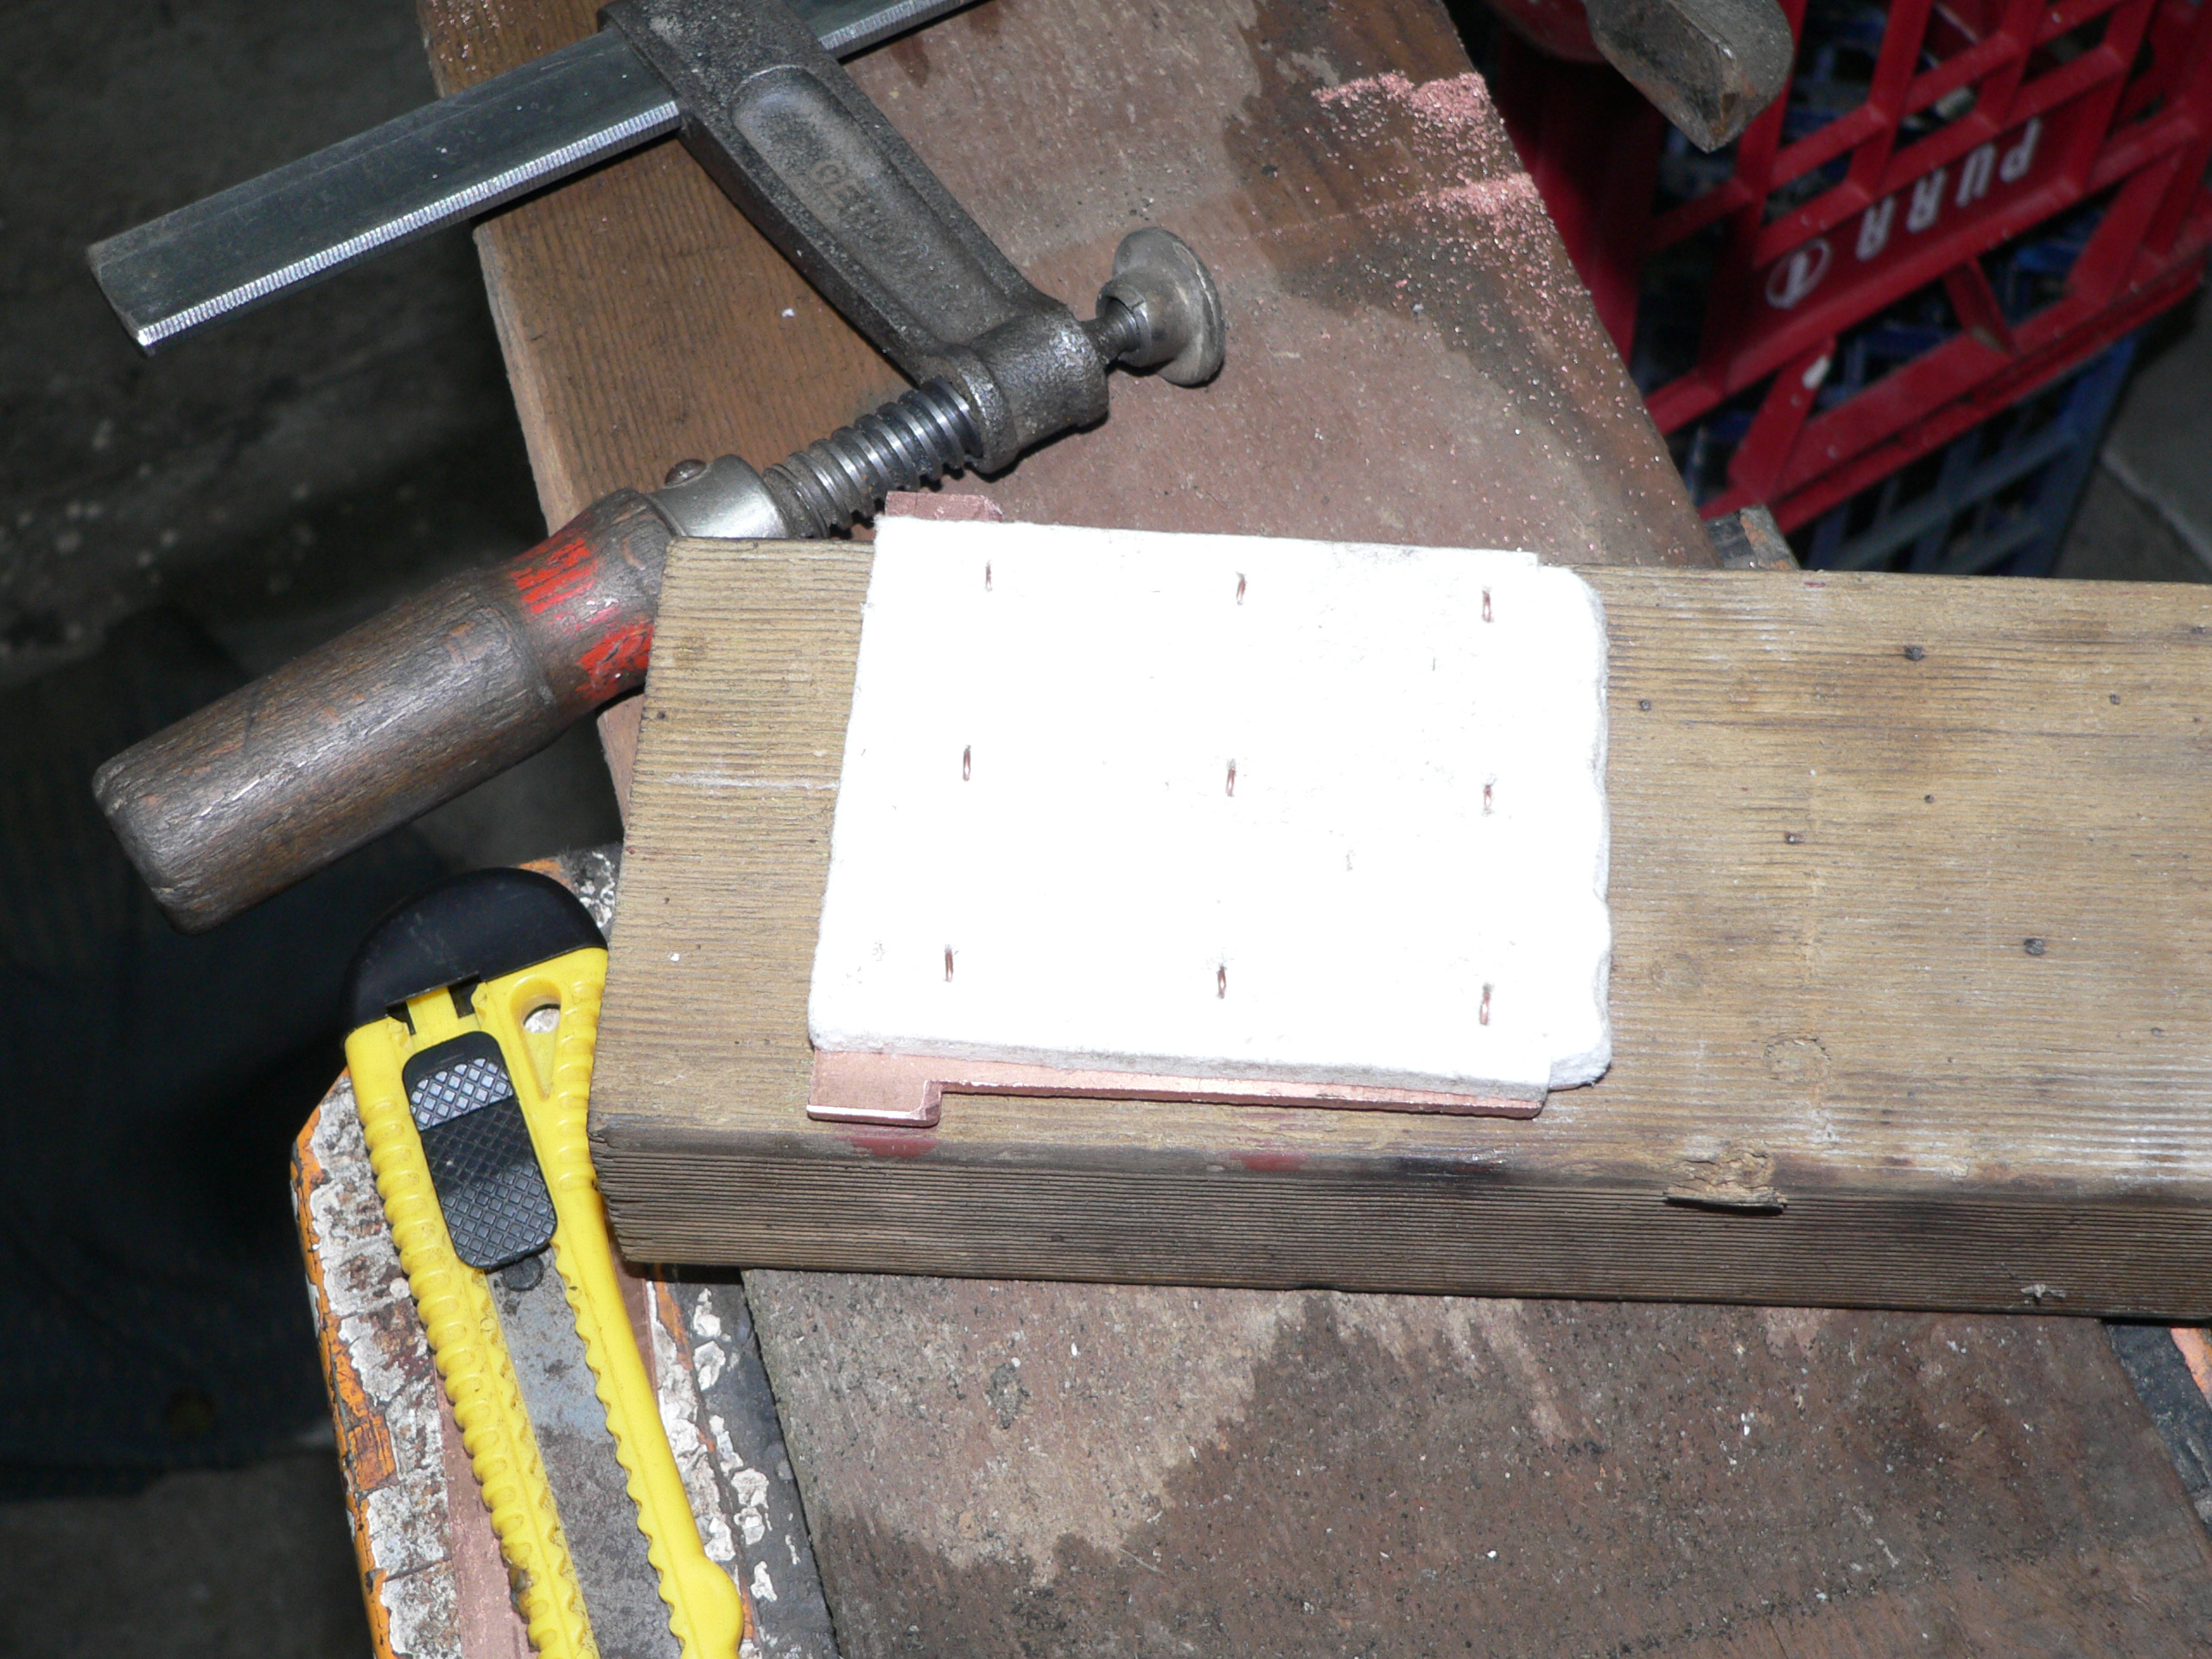
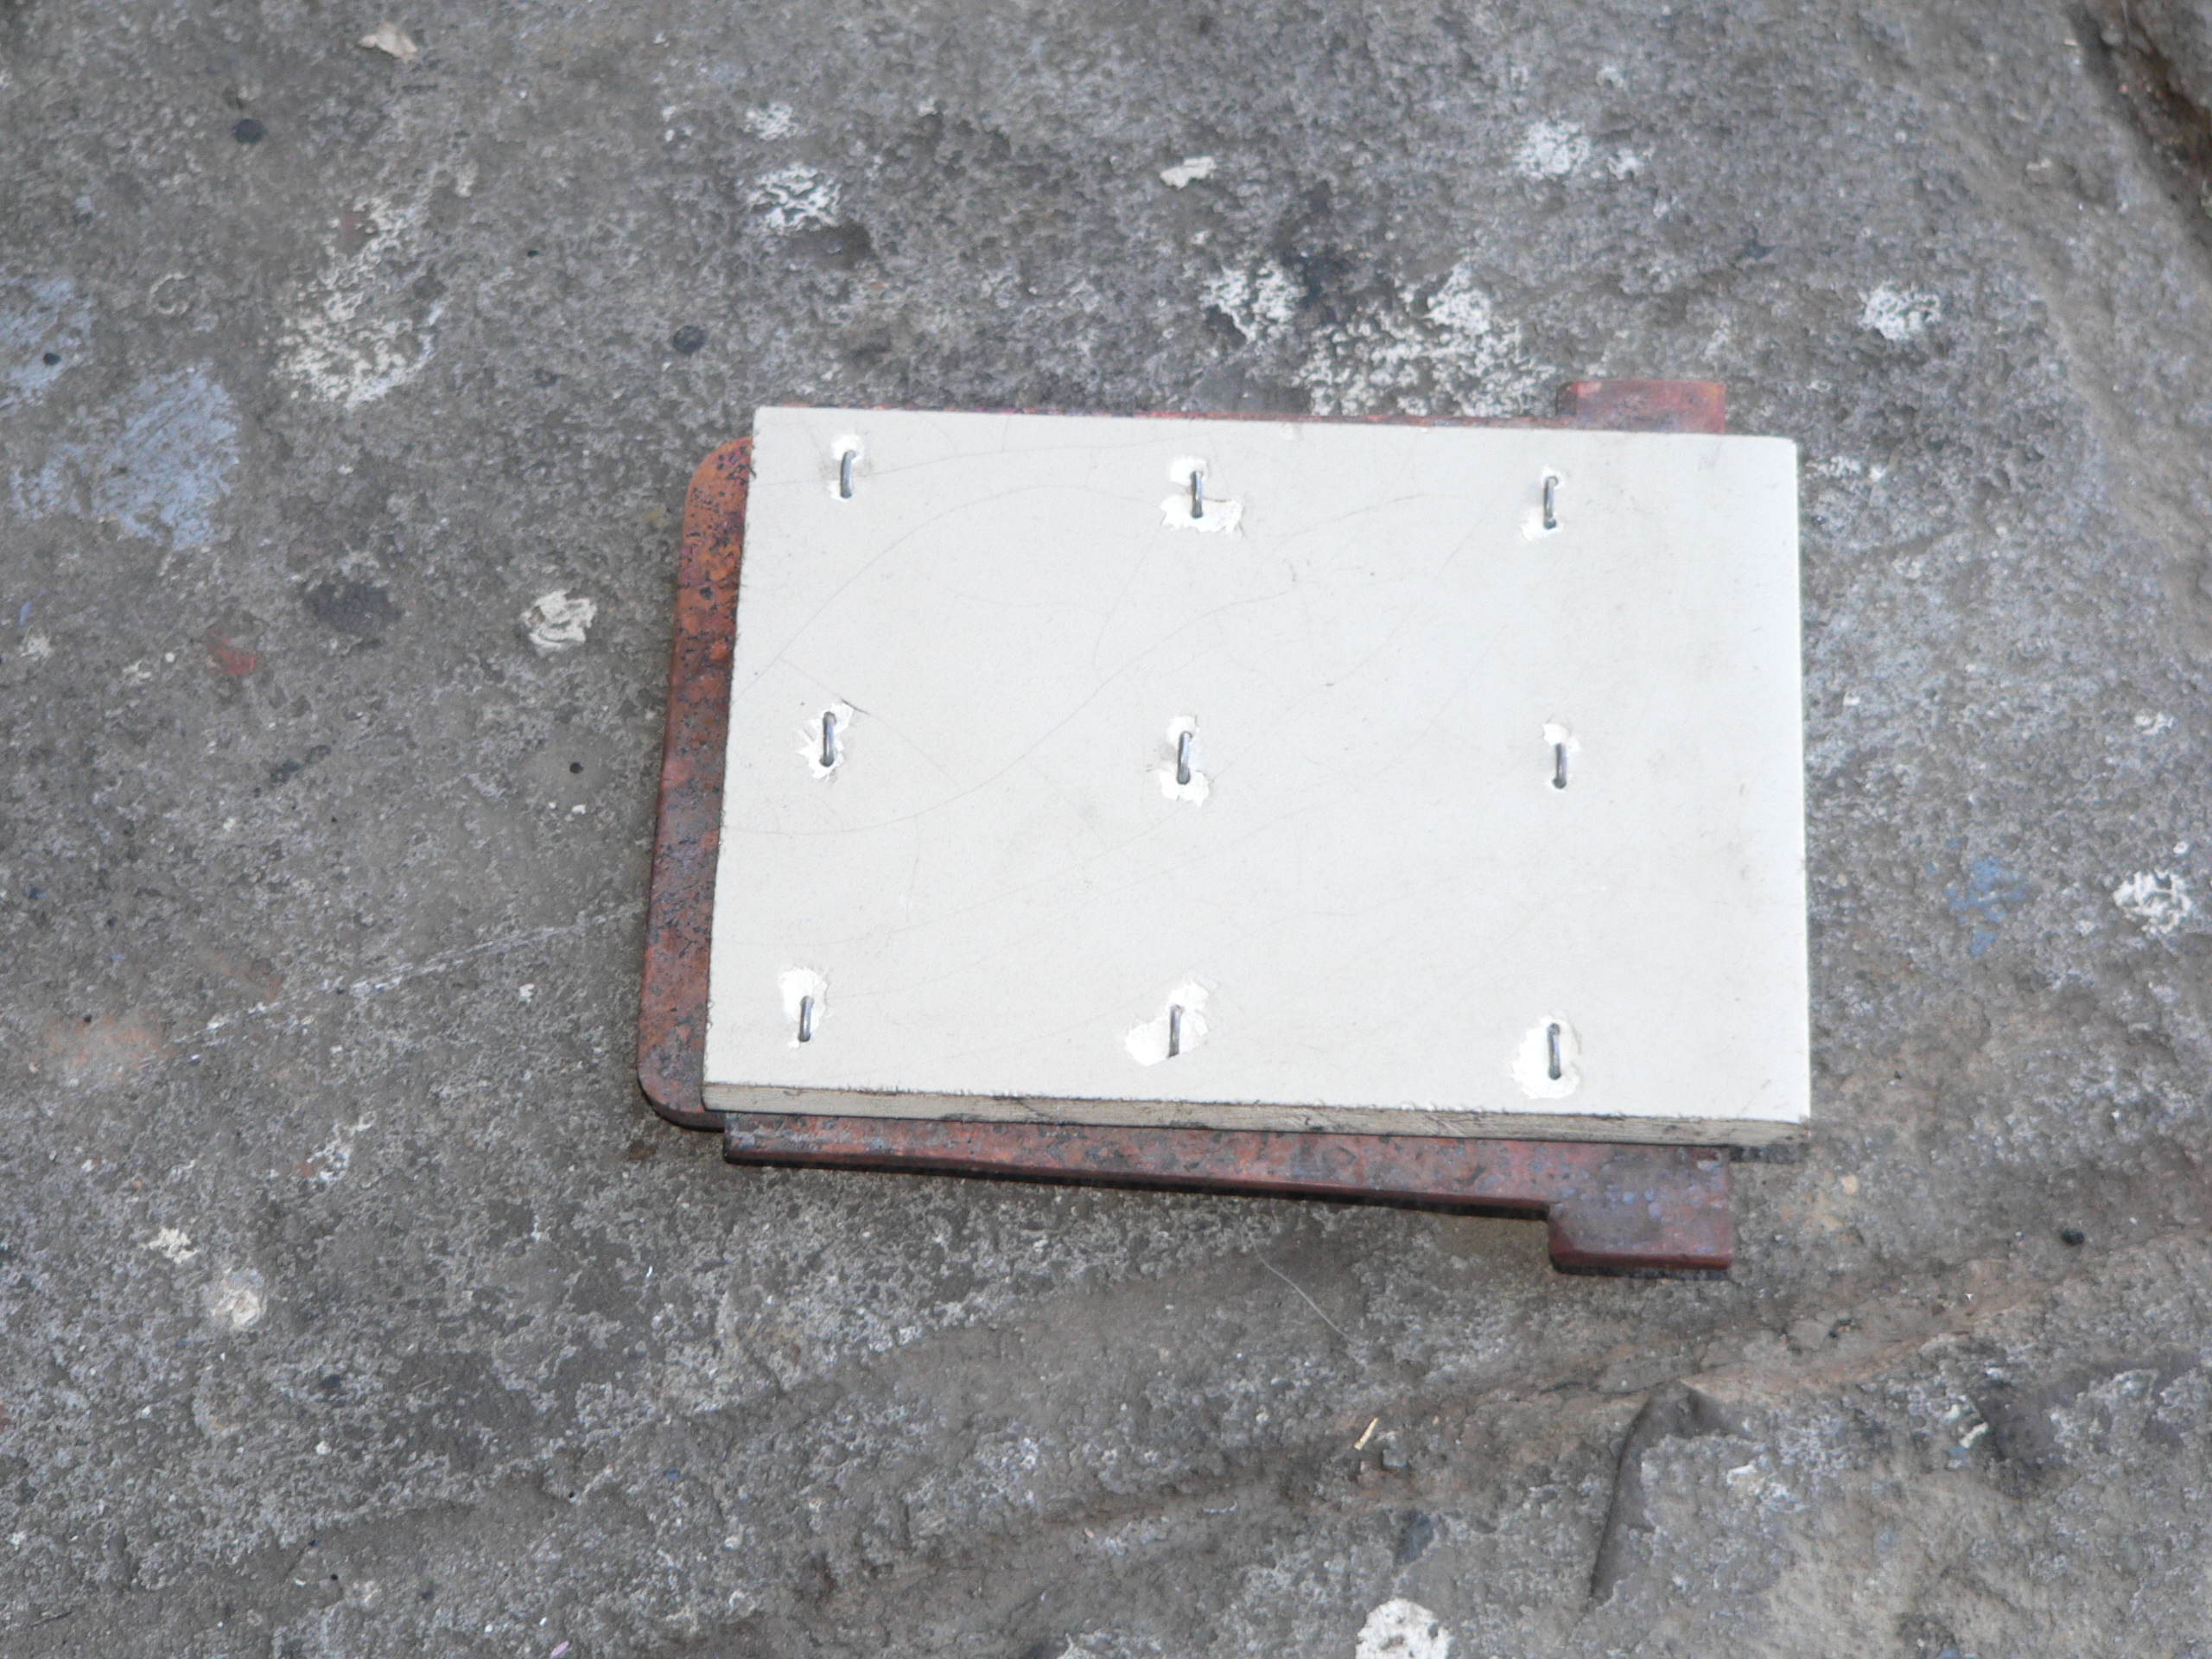
Then I tried some repair products from Rubbedin. They make Redi-Mortar and Black Stove Putty. I made test casts from both and decided to use the putty because the result is a bit more porous and hopefully a better insulator. To avoid distortion and swelling I had to let the cast dry at room temperature for a day and then slowly heat it in a kiln over three days pausing at 100°C for a while and also at 300°C. The first picture shows the cured shield ready for testing. The second picture shows the shield after a test day running at Narara. The shield stayed in place all day but it did crack. It is so easy to bash it with the fire iron when cleaning the fire. I'm now thinking there is no easy answer here.
Further testing with stove Putty showed that it isn't necessary to cure it properly and after 24 hours of warm weather it's ready for use. It still becomes fragile when hot. Now I've gone back to using Kao-board because it's easy to cut and fit. The difference now is that I glue it (using Pyrogrip) to the copper plate as well as fitting the copper loops to hold it in place. Also, I put partial cuts in the board to divide it into nine little pieces. Hopefully this will allow replacement of individual pieces in future.
The latest idea is to use Kao-board with SS mesh (same as spark arrestor) on top and coat this with Pyro-grip to form a thin covering. On the test run the loco was worked hard and the shield was bashed much more often than a good fireman would. Here it is after the run and I'm starting to fix the top corner with Pyro-grip. The rest of the shield looks good.
Last modified 2014-02-10
| Contents | Prev Next |