SMJ Safety valves and dome
Safety Valves
The safety valves were okay at the boiler test but during the subsequent test weekend started lifting early (maybe 60psi). I checked the valves and found that the bronze springs seemed too soft. Tightening the springs to increase the pressure restricted the maximum opening for the valves and this didn't seem safe. The bore is 3/16" so the valves should be able to lift at least 1/16" and I don't think there was enough free travel left in the springs. One option was to replace the safety valves. The problem here is that any replacements won't suit the loco with its fake Ramsbottom lever. Replacement springs are probably available but I couldn't find any.
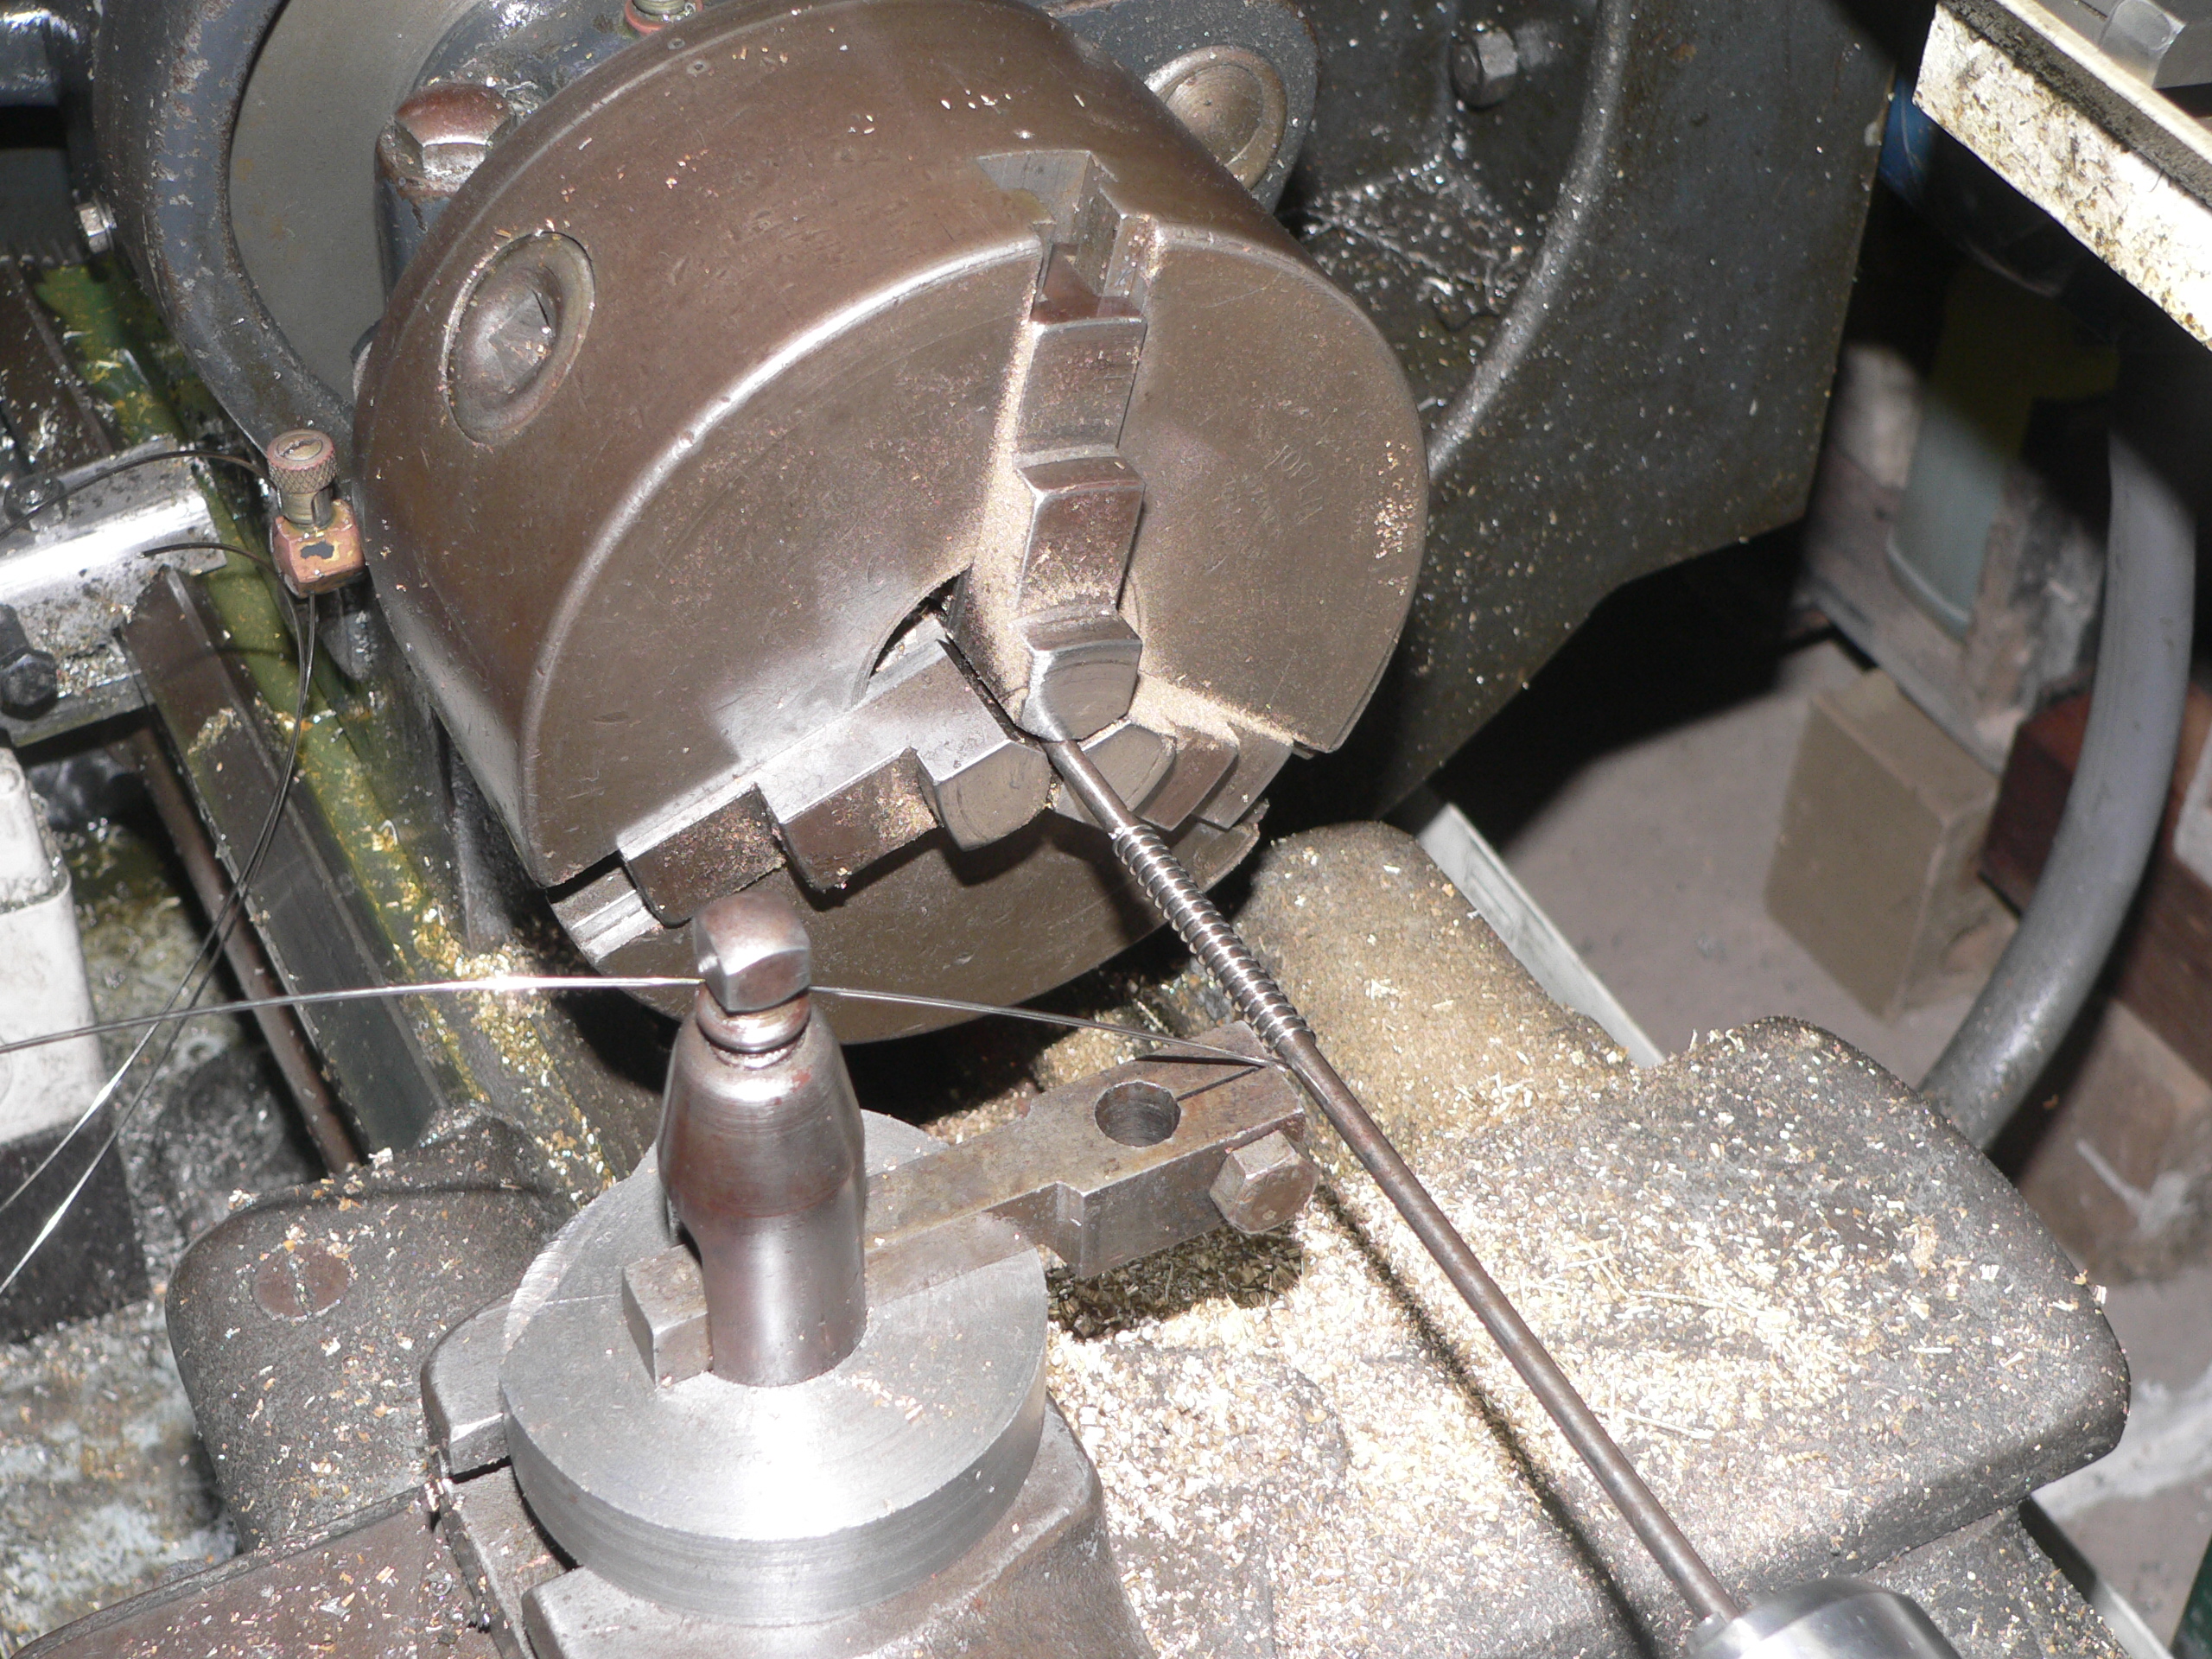
I got some orthodontic springy stainless steel 0.9mm wire and wound a long spring. This was done using a 4mm dia former in the lathe with the auto feed set to 12TPI. Then I stretched and compressed this spring multiple times to work harden the spring. This is what dental technicians do when using the wire. The wire became springier and stabilised after about 10 compresses and stretches.
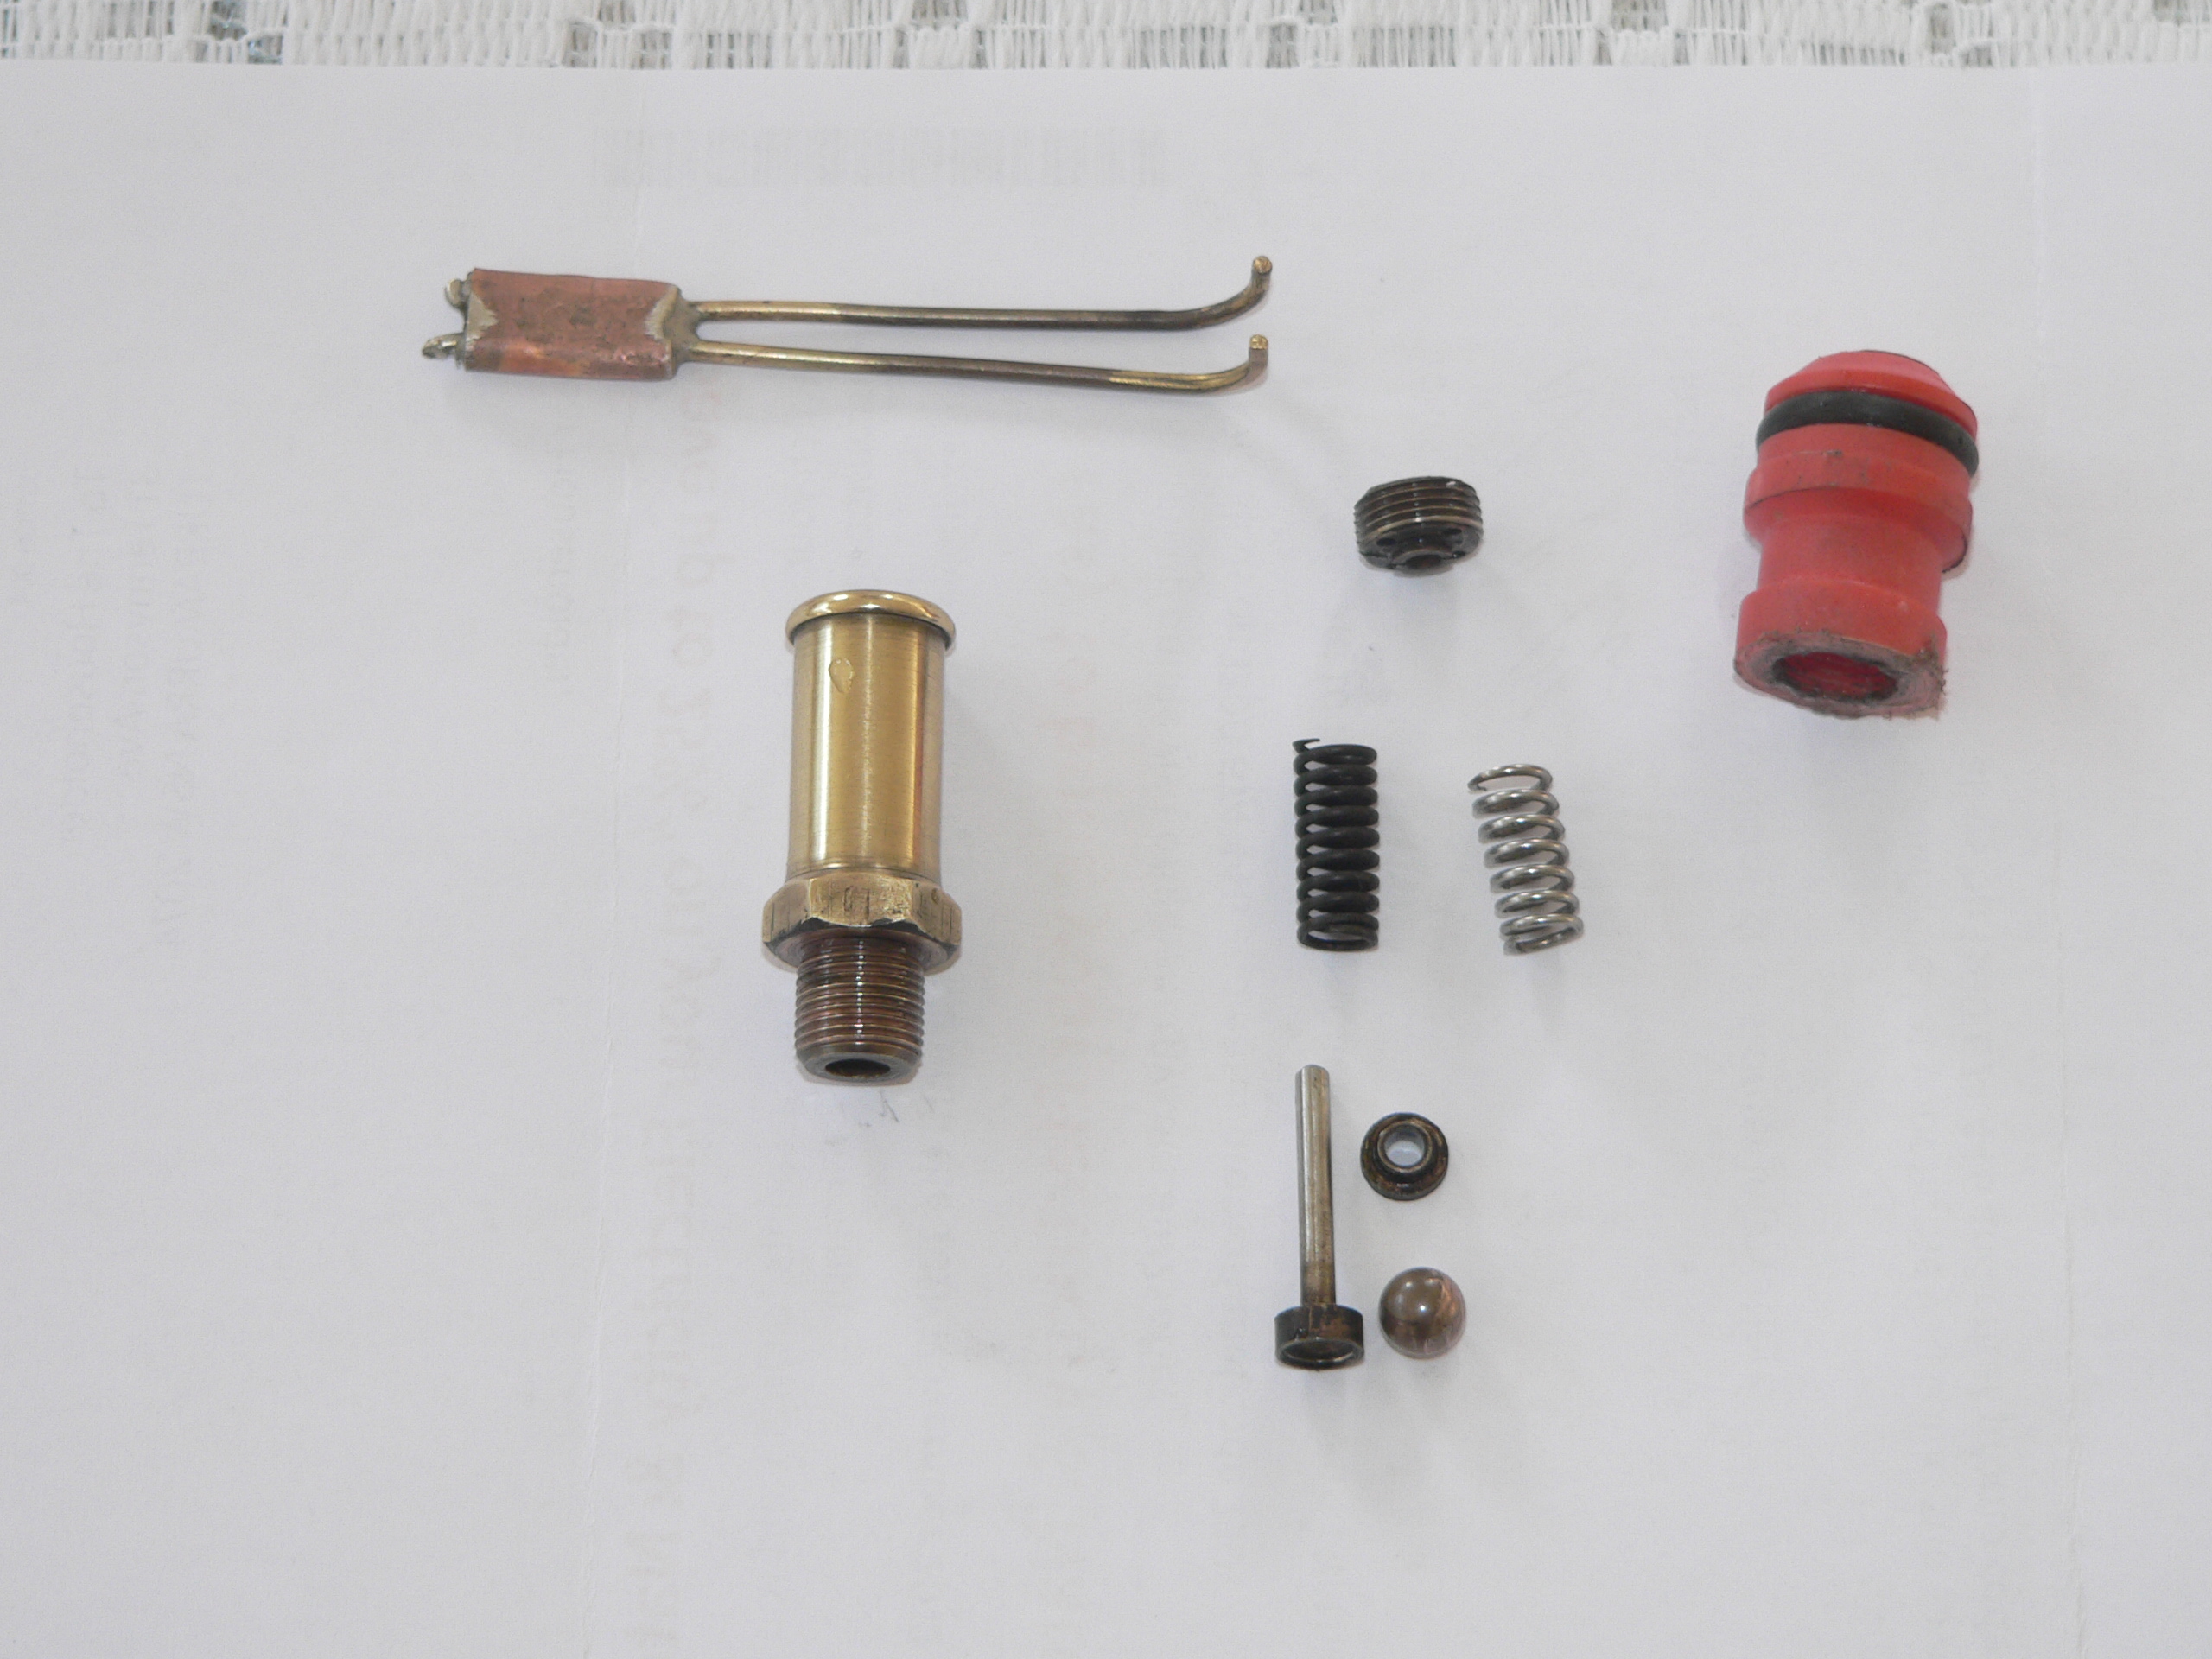
The second picture shows my adjustment tool and the parts of a safety valve with both the old and new springs. The orange plastic fitting has a 3/8" x 32TPI thread and I use this to fit a valve to a hose for initial testing. The town water pressure here is about 75psi which is good for testing an 80psi safety valve.
The repaired safety valves have been fitted. Things look great when clean and polished. When I later did a hydro to check for leaks and set the valves I found that #2 has a slight leak. During a steam test the next day I decided the leak is acceptable at the moment. I had to re-adjust the valves during the steam test which indicates to me that cold setting of safety valves is not a good idea.
A few days later I received some SS balls to replace the bronze balls that were fitted and had marks. The safety valves leak less now. The change required another steam test to set the valves and during this test I lost one of the 8BA grub screws that lock the adjuster. It should have been easy to find because I heard it fly out and hit the roof of the garage but it wasn't. After over one hour of searching I decided to make a replacement. Machining some M6 SS rod to 2.2mm and putting an 8BA thread on part of the rod was harder than I thought and took multiple attempts. Whoever did the originals (presumably Jack Esdaile) did a very good job.
Ramsbottom lever
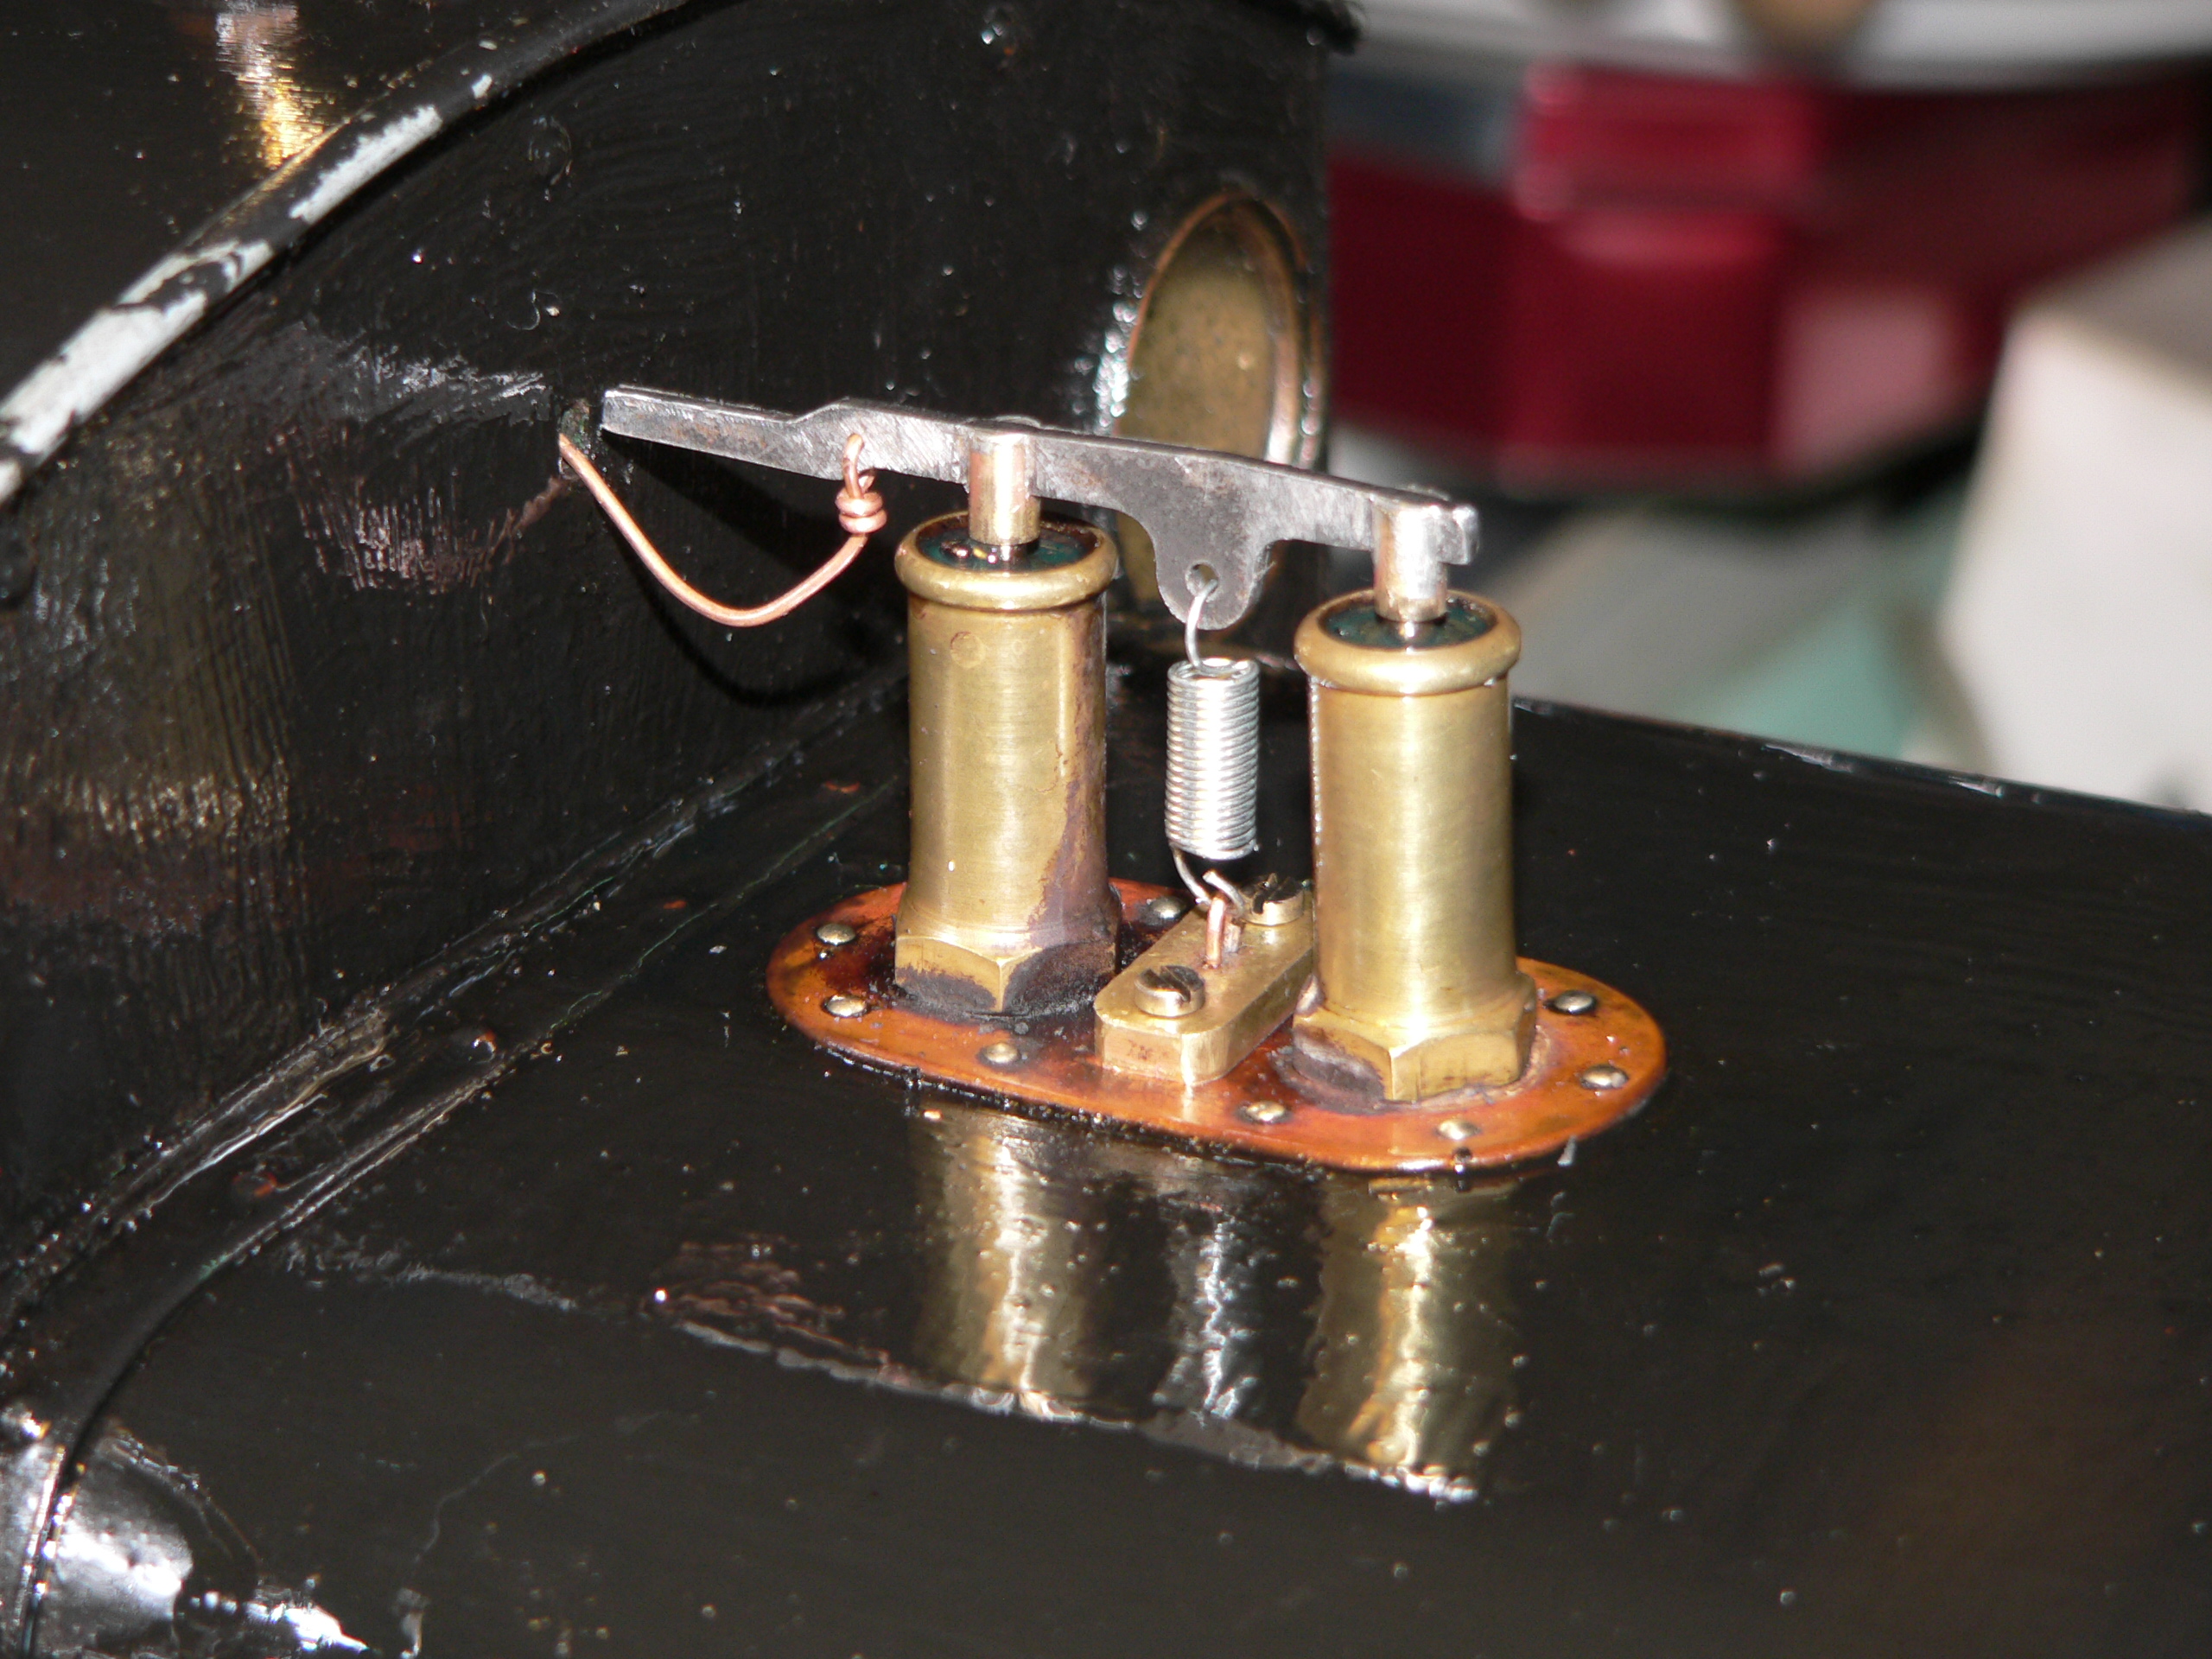
The real SMJ 16 had a Ramsbottom safety valve and the 5" version has a decorative Ramsbottom lever and spring above the safety valves. This lever makes it harder to tap a valve spindle to stop it leaking. I wondered about making a functional lever to press on the valve spindles and loosening the internal springs to compensate. The AALS rules state that any safety valve must have all parts secured so nothing can fly off if a spring breaks. This is very sensible of course but does make a model Ramsbottom valve much harder to construct. Also, getting both valves to lift at the proper pressure would be very difficult.
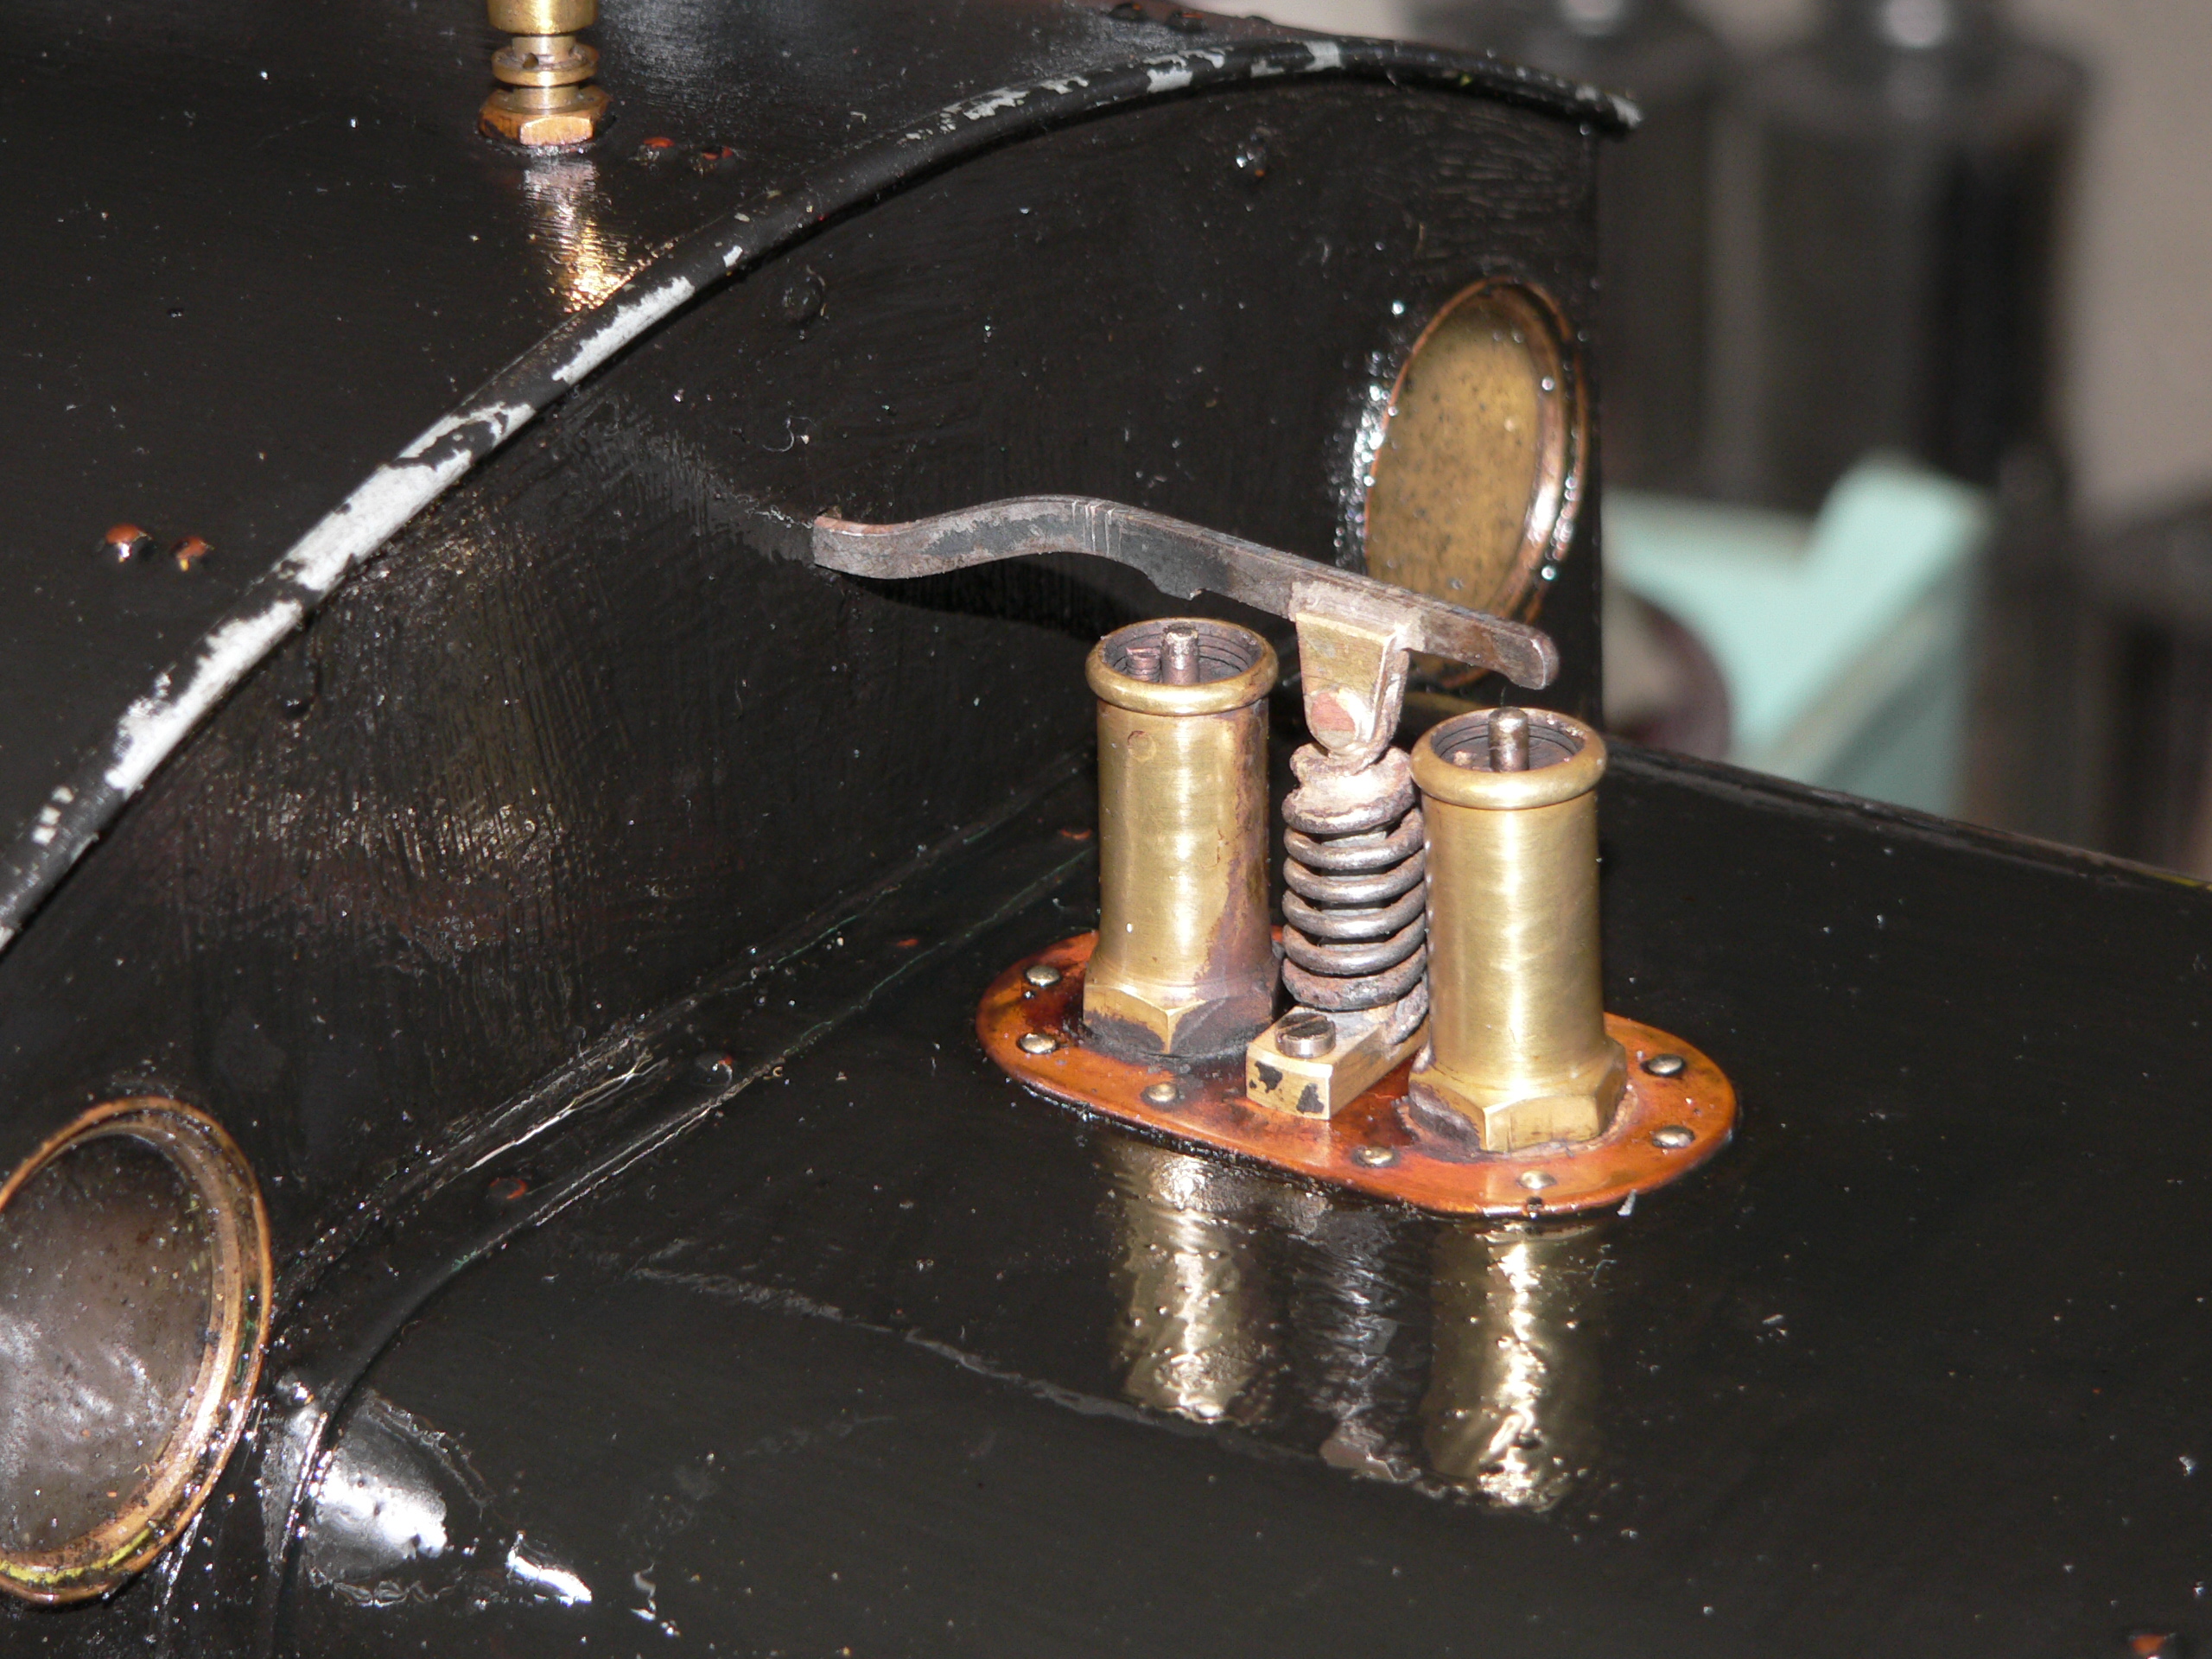
The decorative lever sits just above the valve spindles and the assembly is rigid. I made a replacement that sits on the valve spindles and is held down by a weak spring. This means I can tap the lever if a valve is leaking and also I can lift the assembly out of the way if I want to adjust a valve. This is done by screwing the internal collar in each valve.
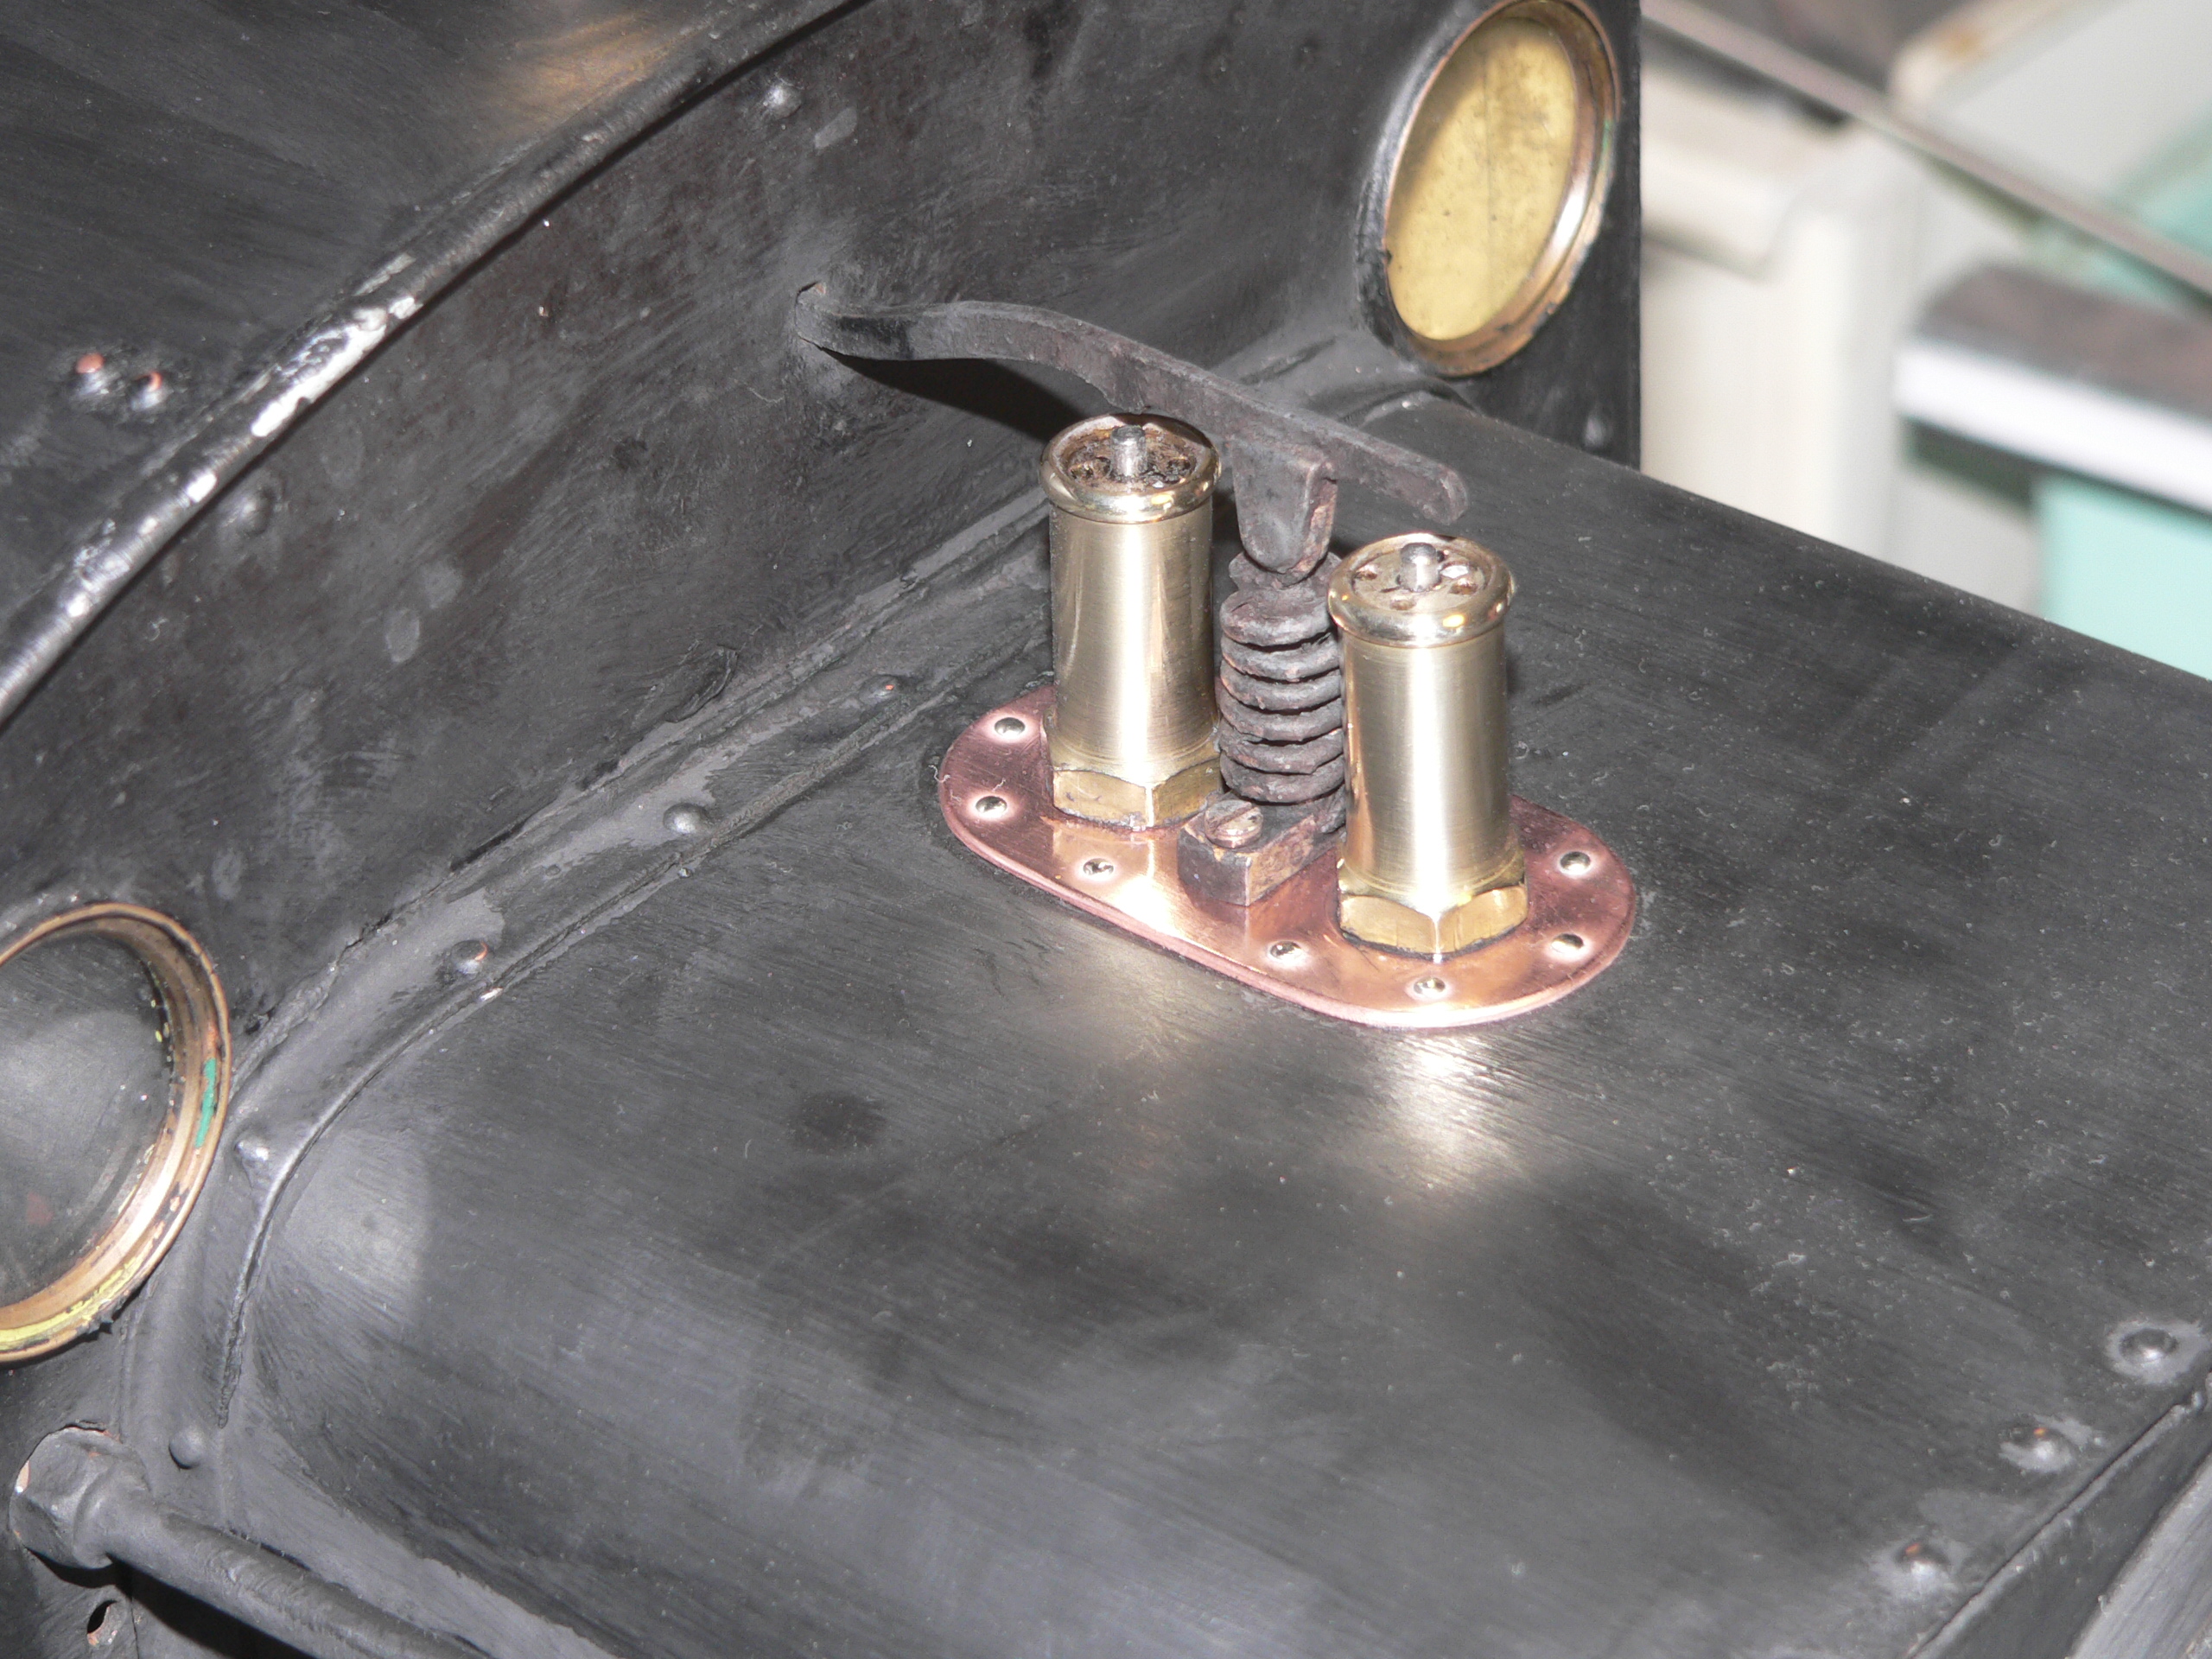
The left picture shows the original lever and spring. The right picture shows the replacement lever with brass fittings that sit on each valve spindle and the central spring that holds the lever in place. The extra force on each valve spindle is minimal and I can loosen the real springs (in the safety valves) to compensate if required. It's very difficult to fit a restraining link inside the spring so I've tied a wire to the back of the lever to restrain it if the spring breaks. The new lever is now painted but didn't photograph as well.
Dome Cosmetics
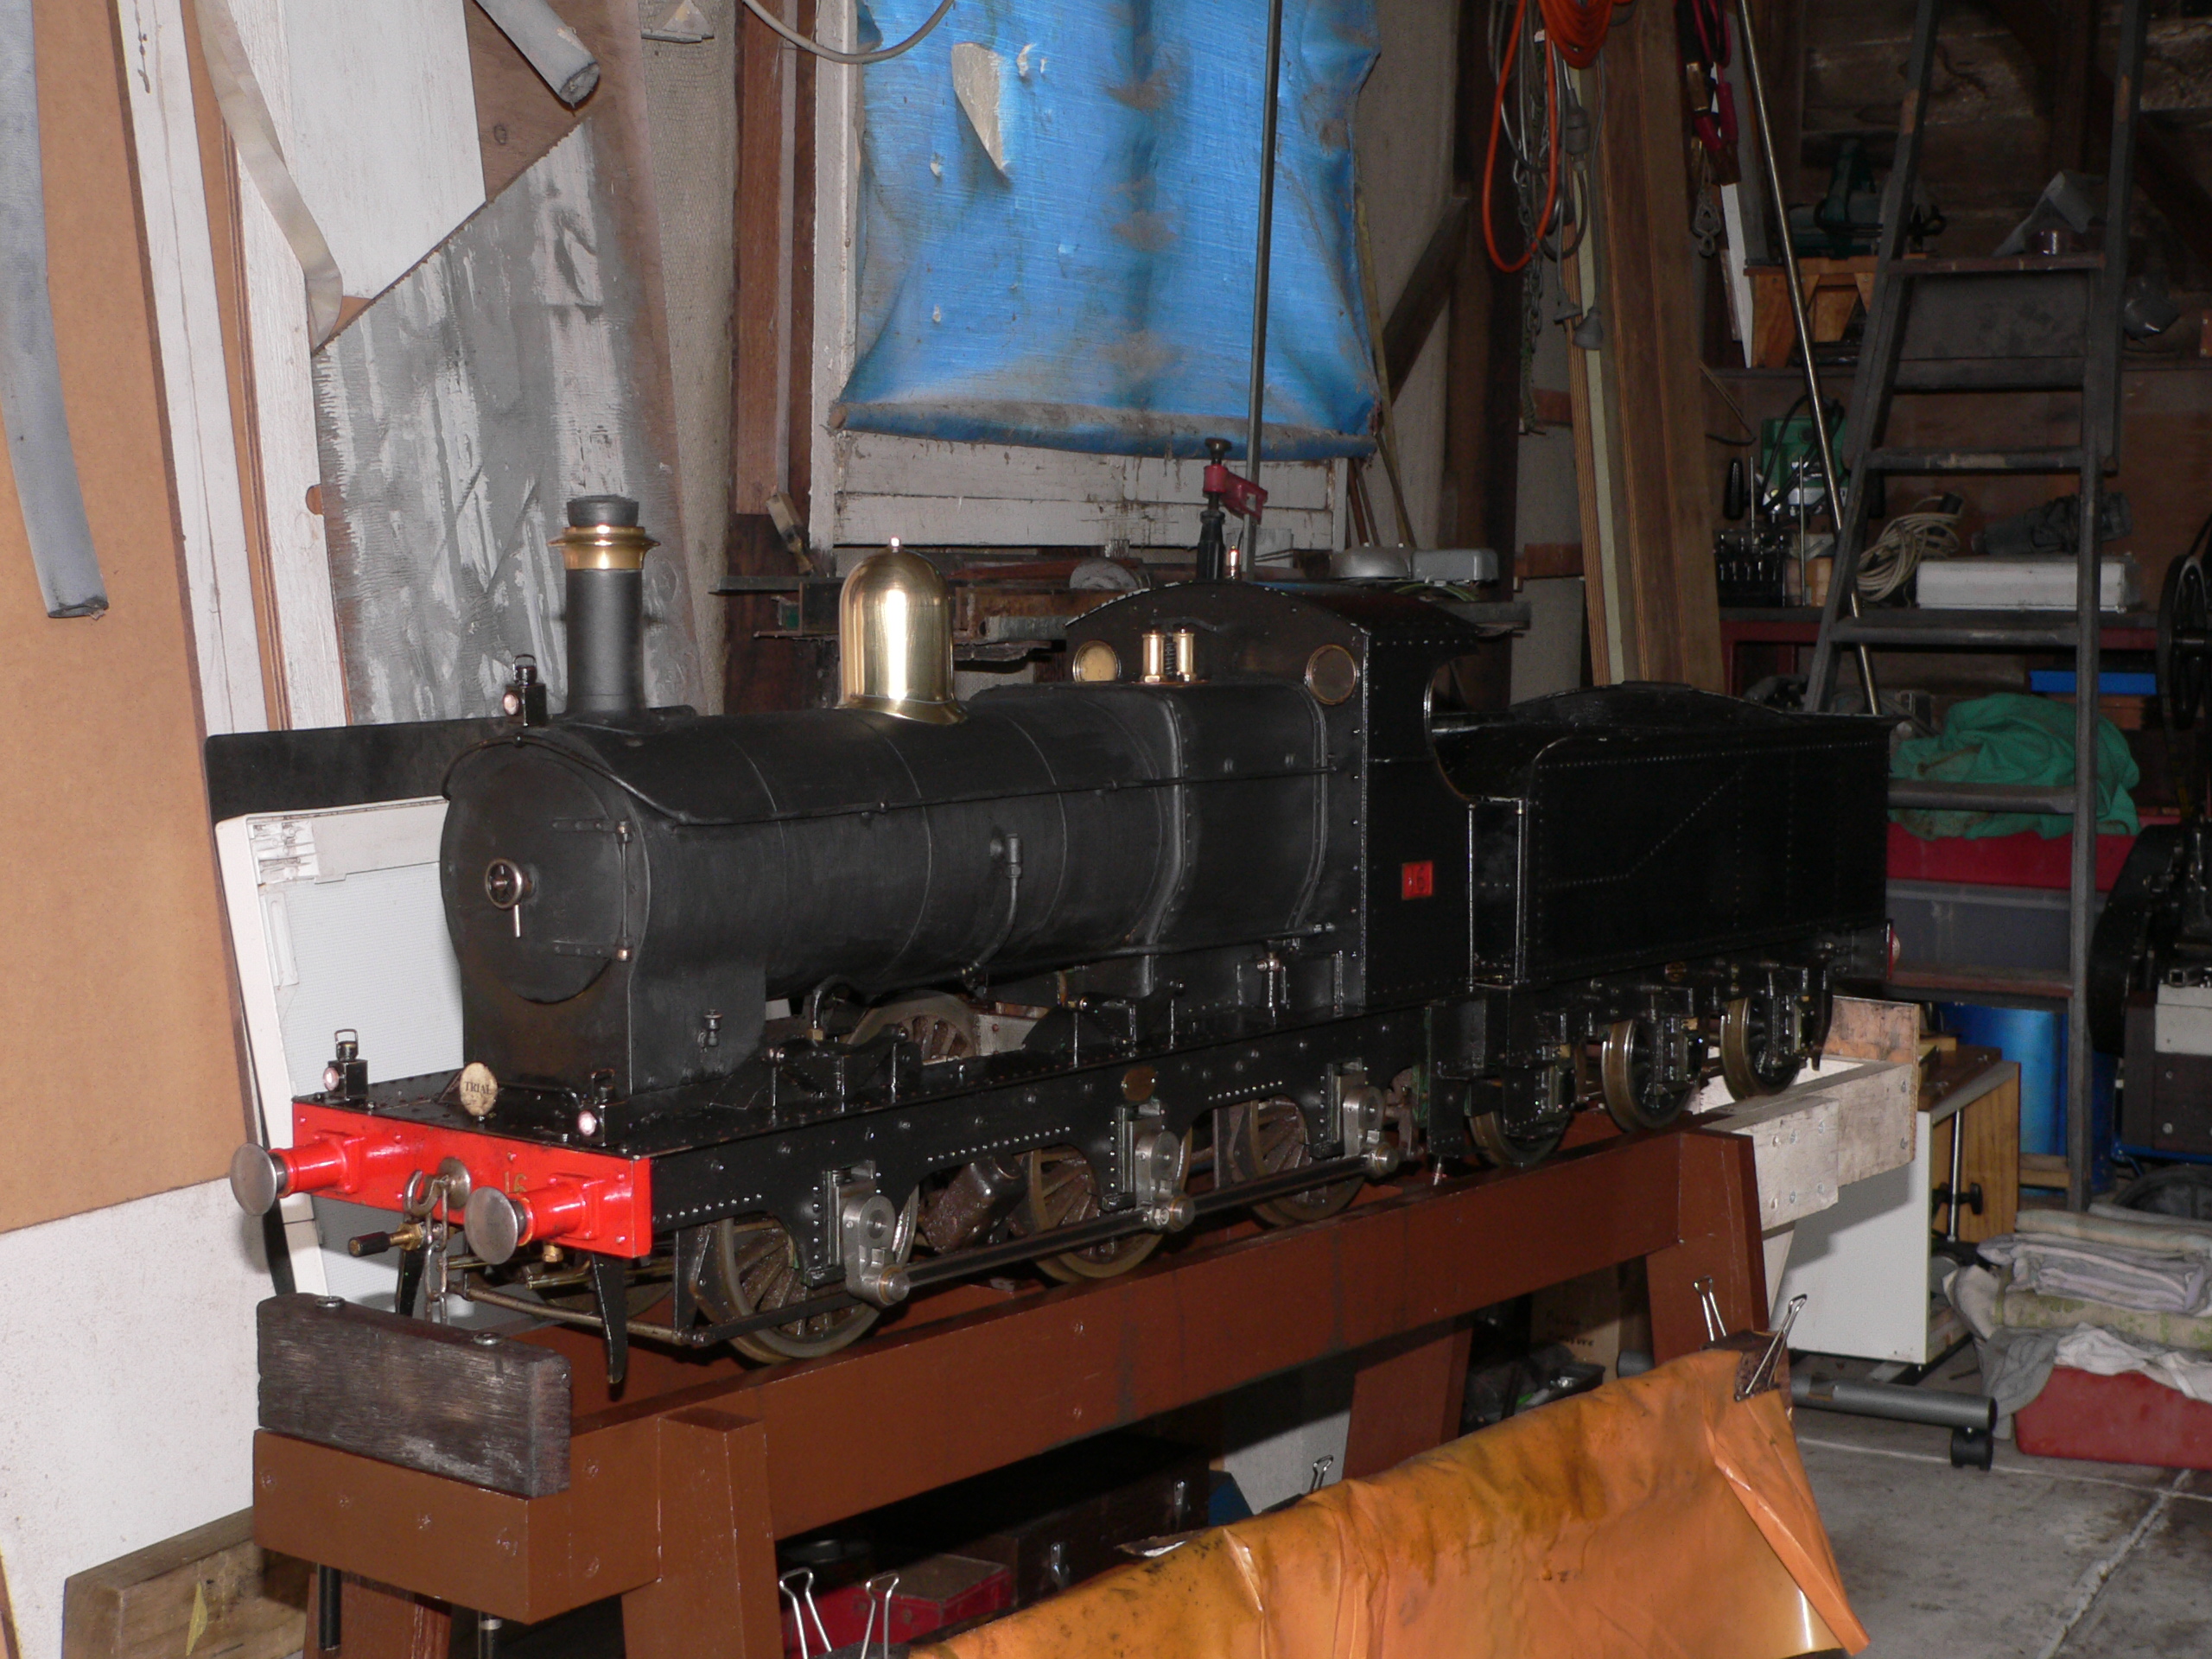
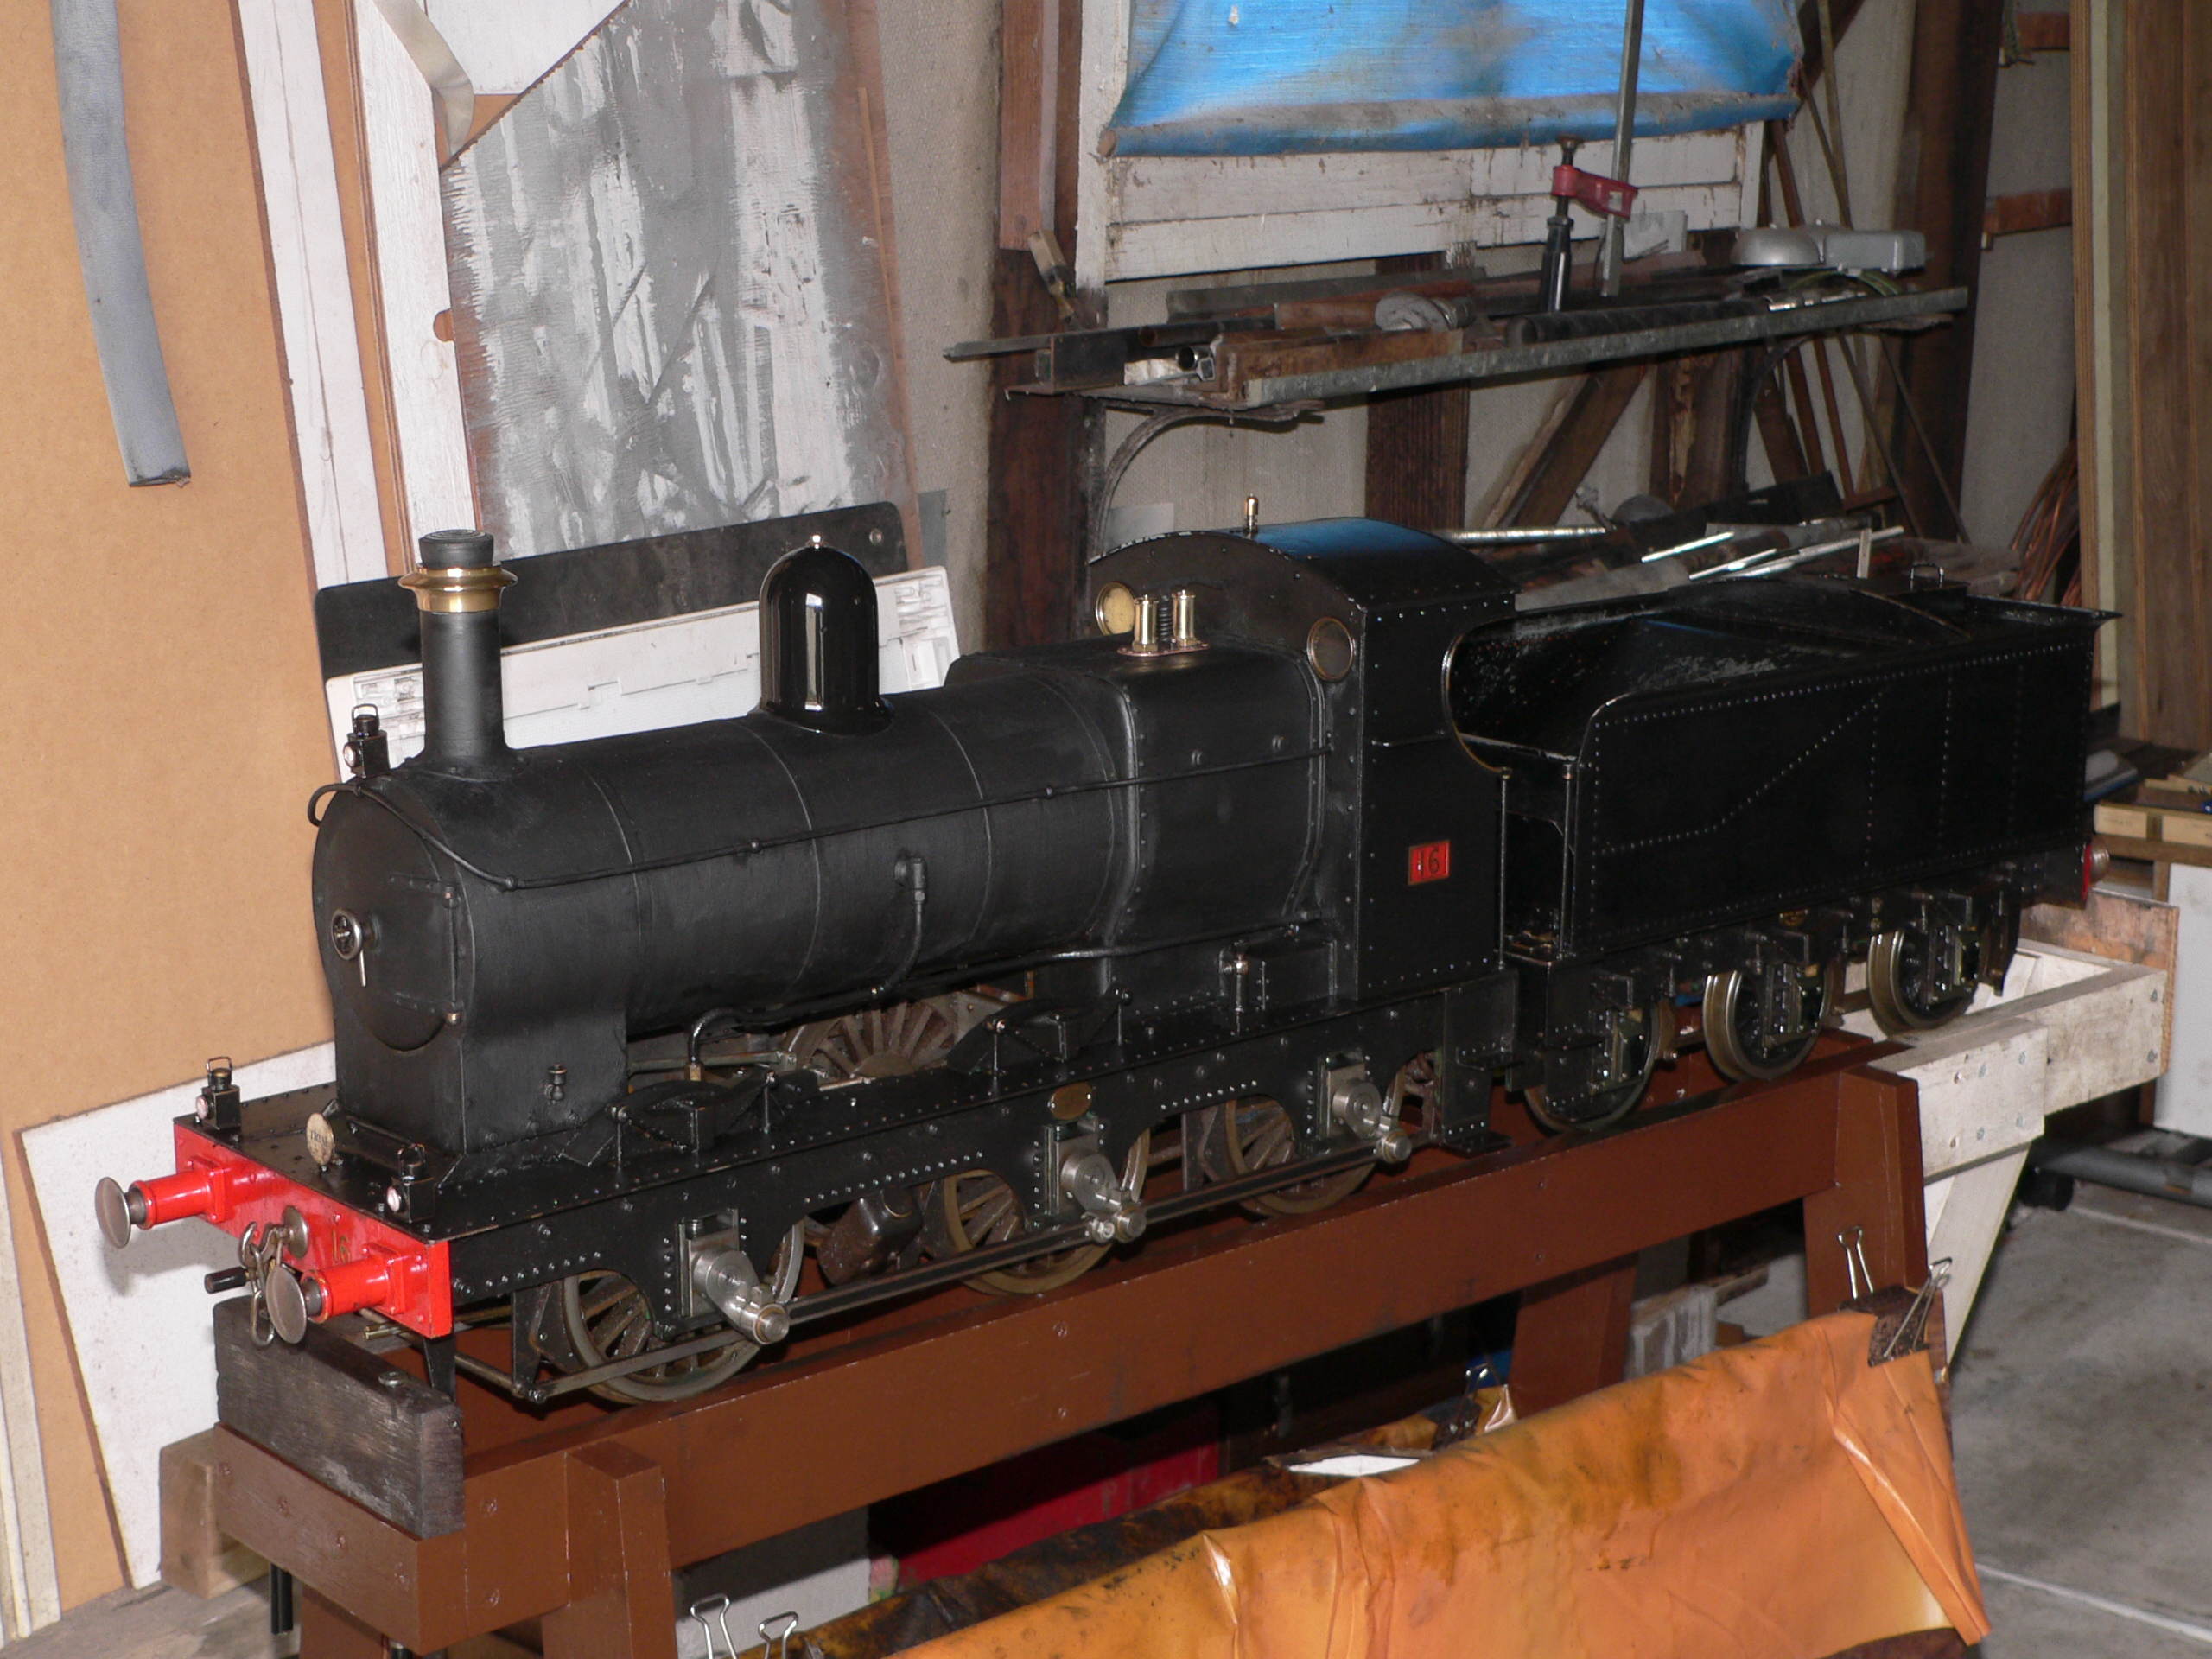
The paint on the dome was flaking badly. Brass domes seem a bit garish to me on black locos. I removed the remaining paint and found that the black had been applied directly on the brass. It looks like the idea of a brass dome had been tried and discarded and a quick repaint done after. I cleaned and polished the dome with the idea of having a brass dome for the next run at least. The left photo shows the loco with its shiny brass dome. It just didn't look right to me so I've sprayed the cover with etch primer and then black gloss. The black gloss does stand out a bit. It looks good to me and will quickly dirty and blend in with the rest of the loco.
Last modified 2013-07-11
| Contents | Prev Next |